Activity: Set up Red Hat Service Interconnect on OpenShift
Module 1
You can set up Virtual Application Networks with Red Hat Service Interconnect by either using the command line interface or the OpenShift operator.
In this exercise, we’ll use the operator on the OpenShift cluster and the command line interface on the RHEL side just to explore both options. You could also use automation tools such as Ansible to automate the creation of the Virtual Application Network on both sides.
Verify database access from Travels Service
-
As a first step, verify whether the
travelsservices has connectivity to the database. You will use the integrated terminal on the right to perform these checks as guided. -
In the upper terminal, log in to the OpenShift cluster using the command below. Click the clipboard icon
 to copy.
oc login -u admin -p {ocp_cluster_openshift_cluster_admin_password} https://172.30.0.1:443Type
ywhen you are prompted withUse insecure connections? (y/n).
You should see aLogin successfulmessage -
From the OpenShift Terminal (upper terminal), run the following command to check if the
travelsservice and all other services (cars, discounts etc) are able to access the on-prem database.curl travels.travel-agency.svc.cluster.local:8000/travels/Prague && echo -
You will receive a response
{"error":"Travel Quote for Prague not found"}indicating that the database is not accessible, and the service is unable to get a travel quote for Prague.
Set up a Red Hat Service Interconnect Site
You will set up a Virtual Application Network using Red Hat Service Interconnect in the subsequent steps to help the core services (on OpenShift) access the on-premises database.
-
Navigate to the {ocp_cluster_openshift_cluster_console_url}/k8s/cluster/projects/travel-db/openshift-site-plugin[OpenShift Console, window="console"], and log in with username
adminand password{ocp_cluster_openshift_cluster_admin_password} -
Navigate to Home → Projects → travel-db, if you are not already in the
travel-dbproject.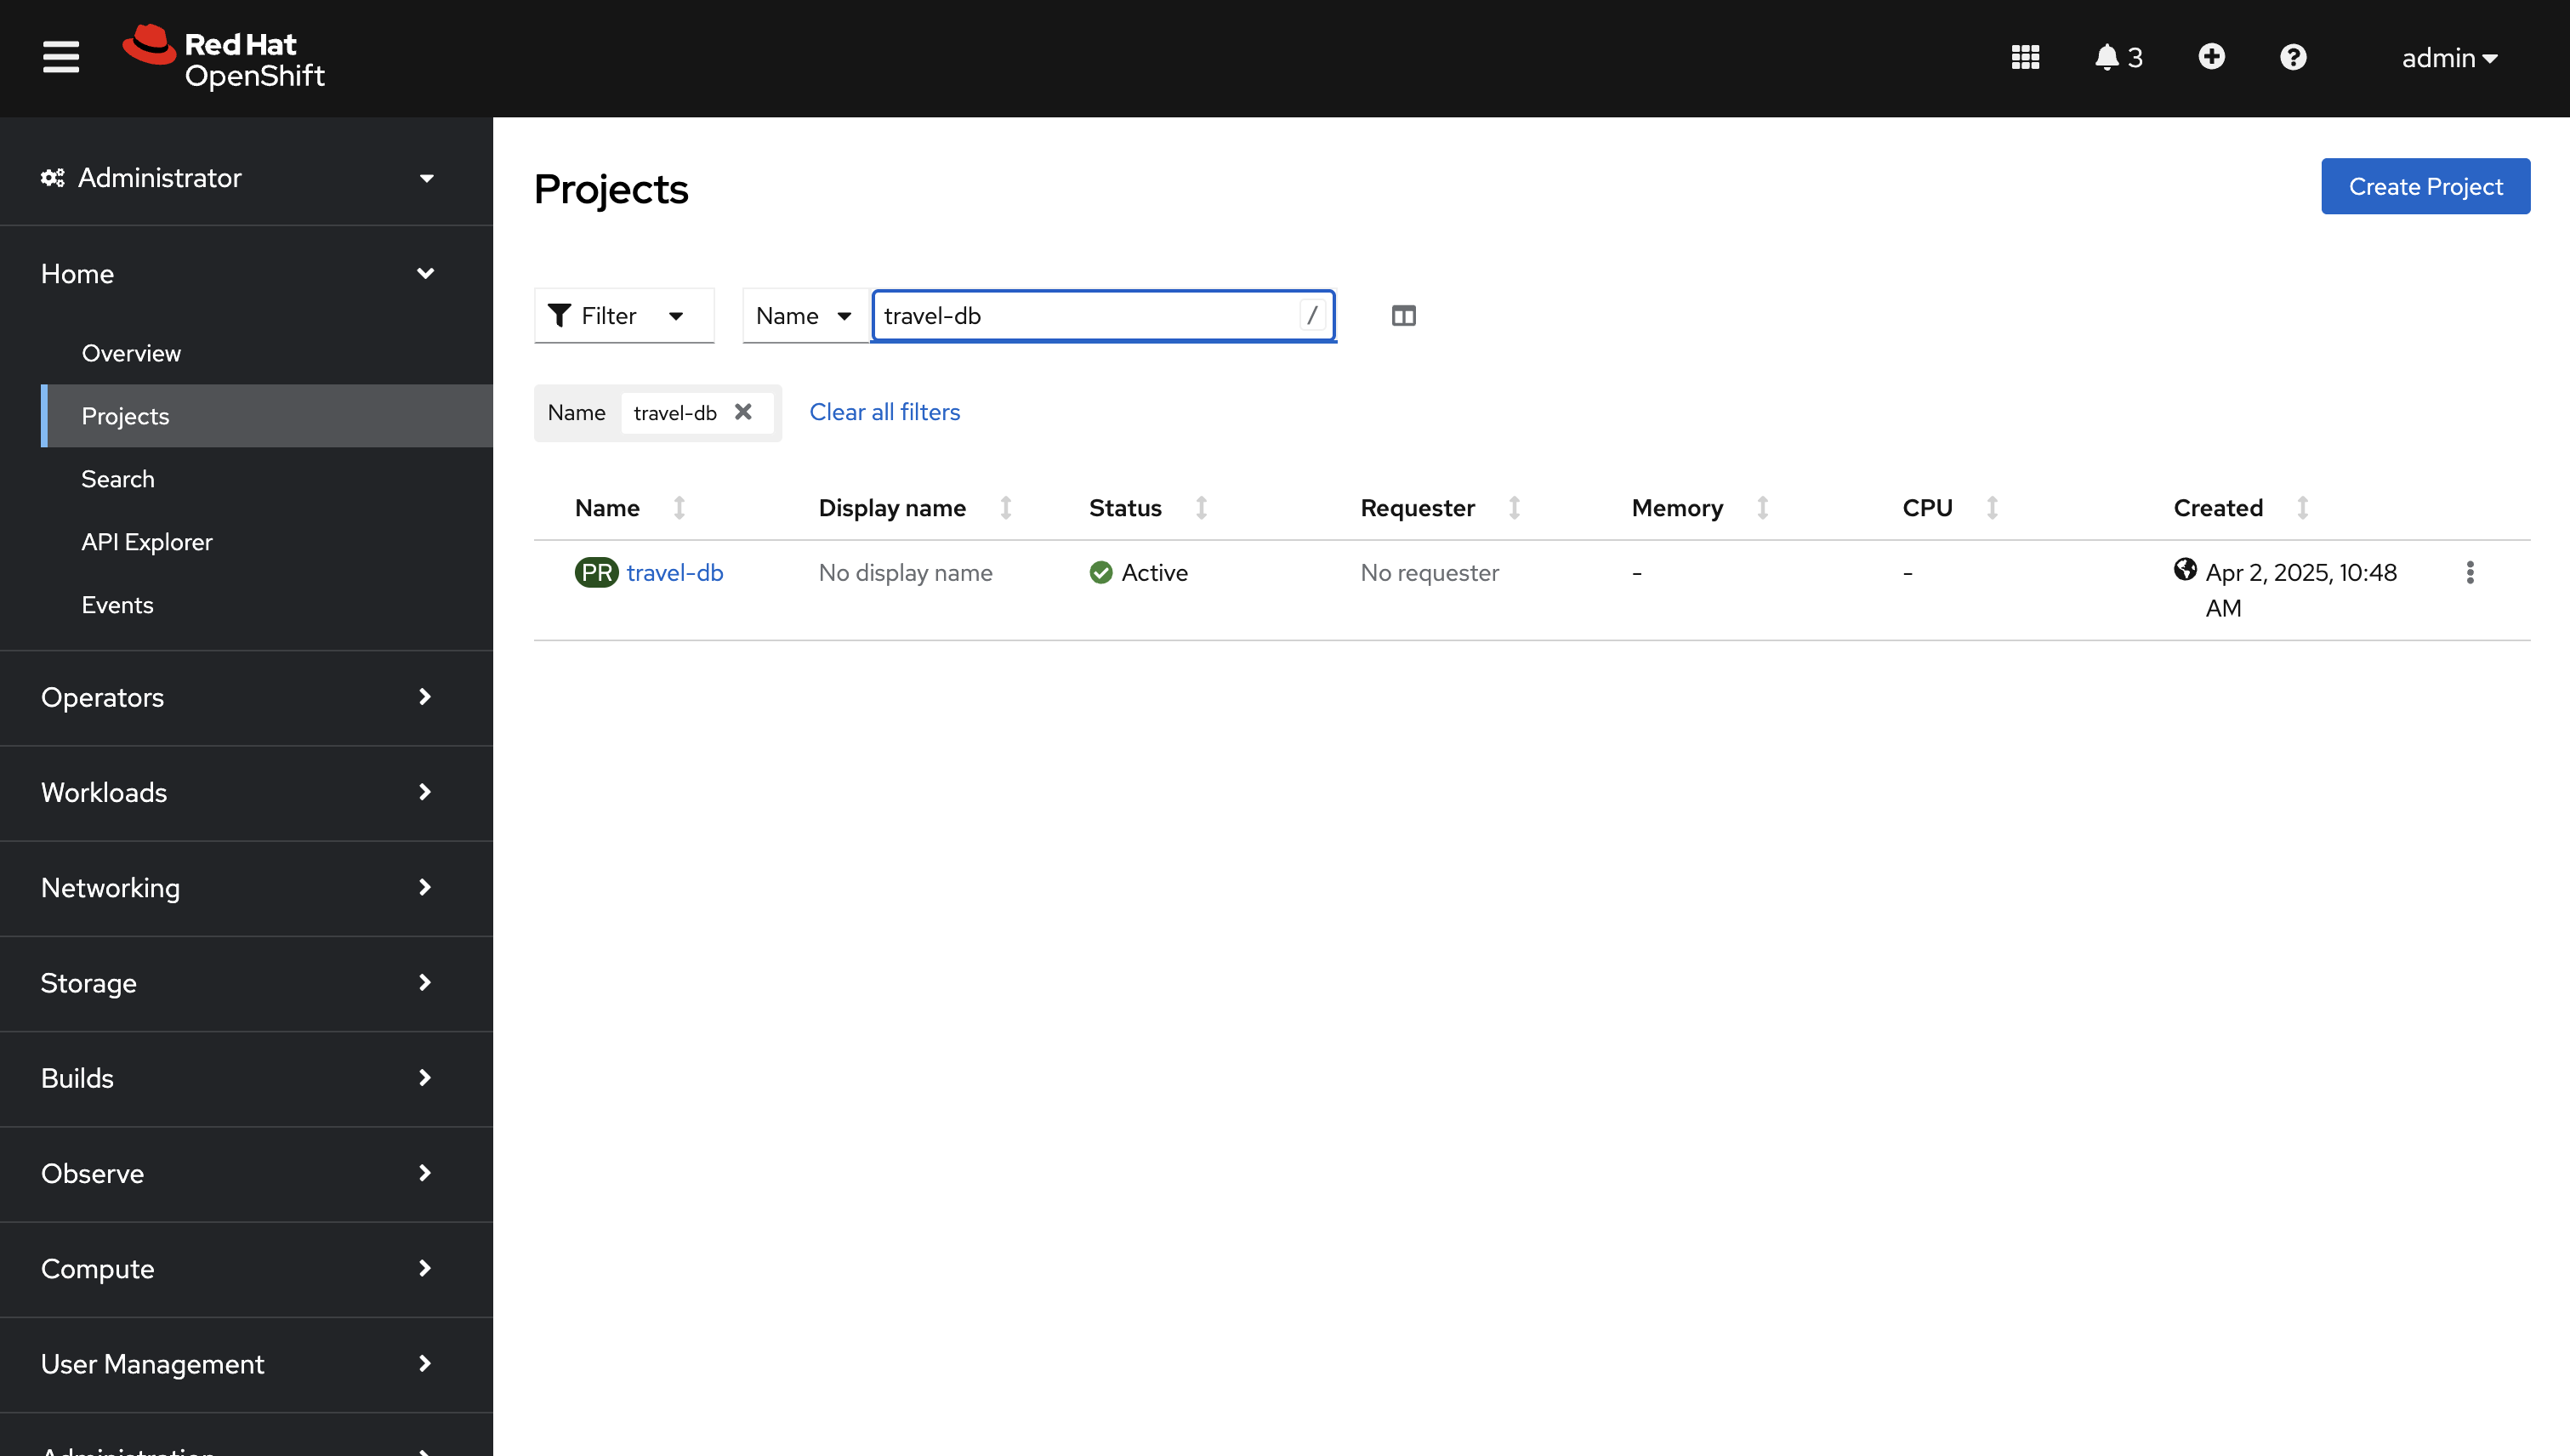
-
From the
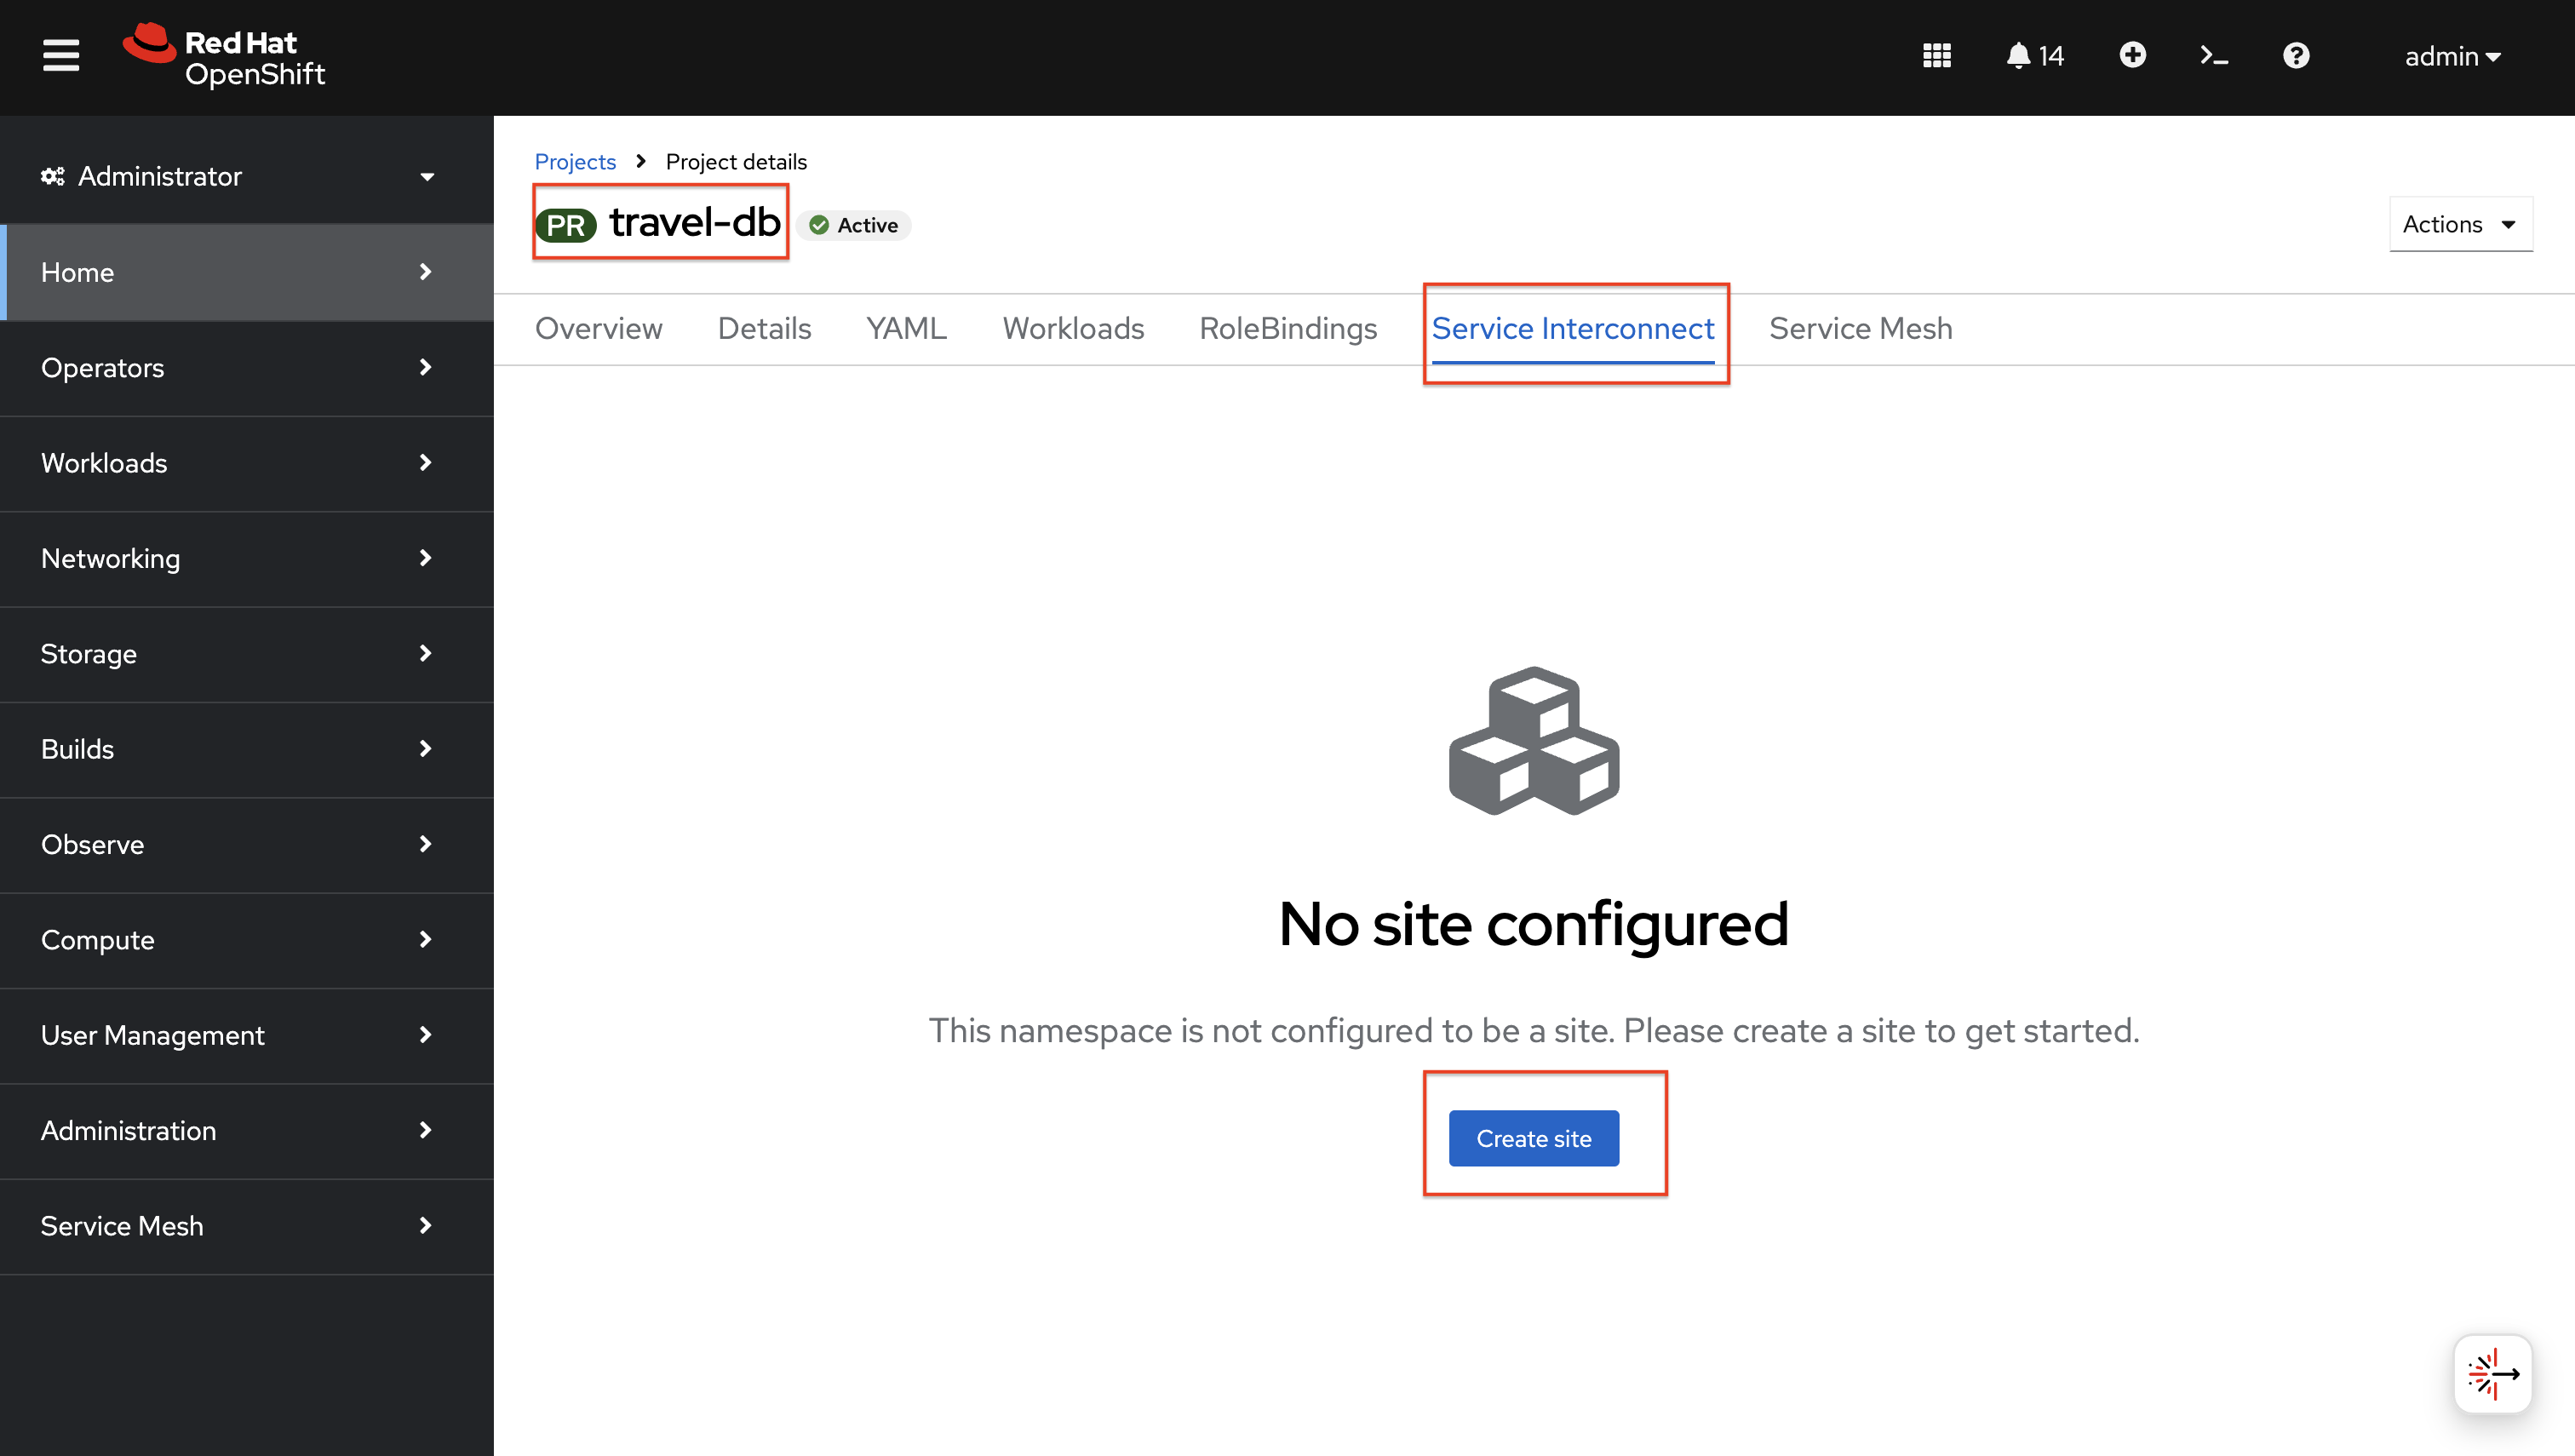
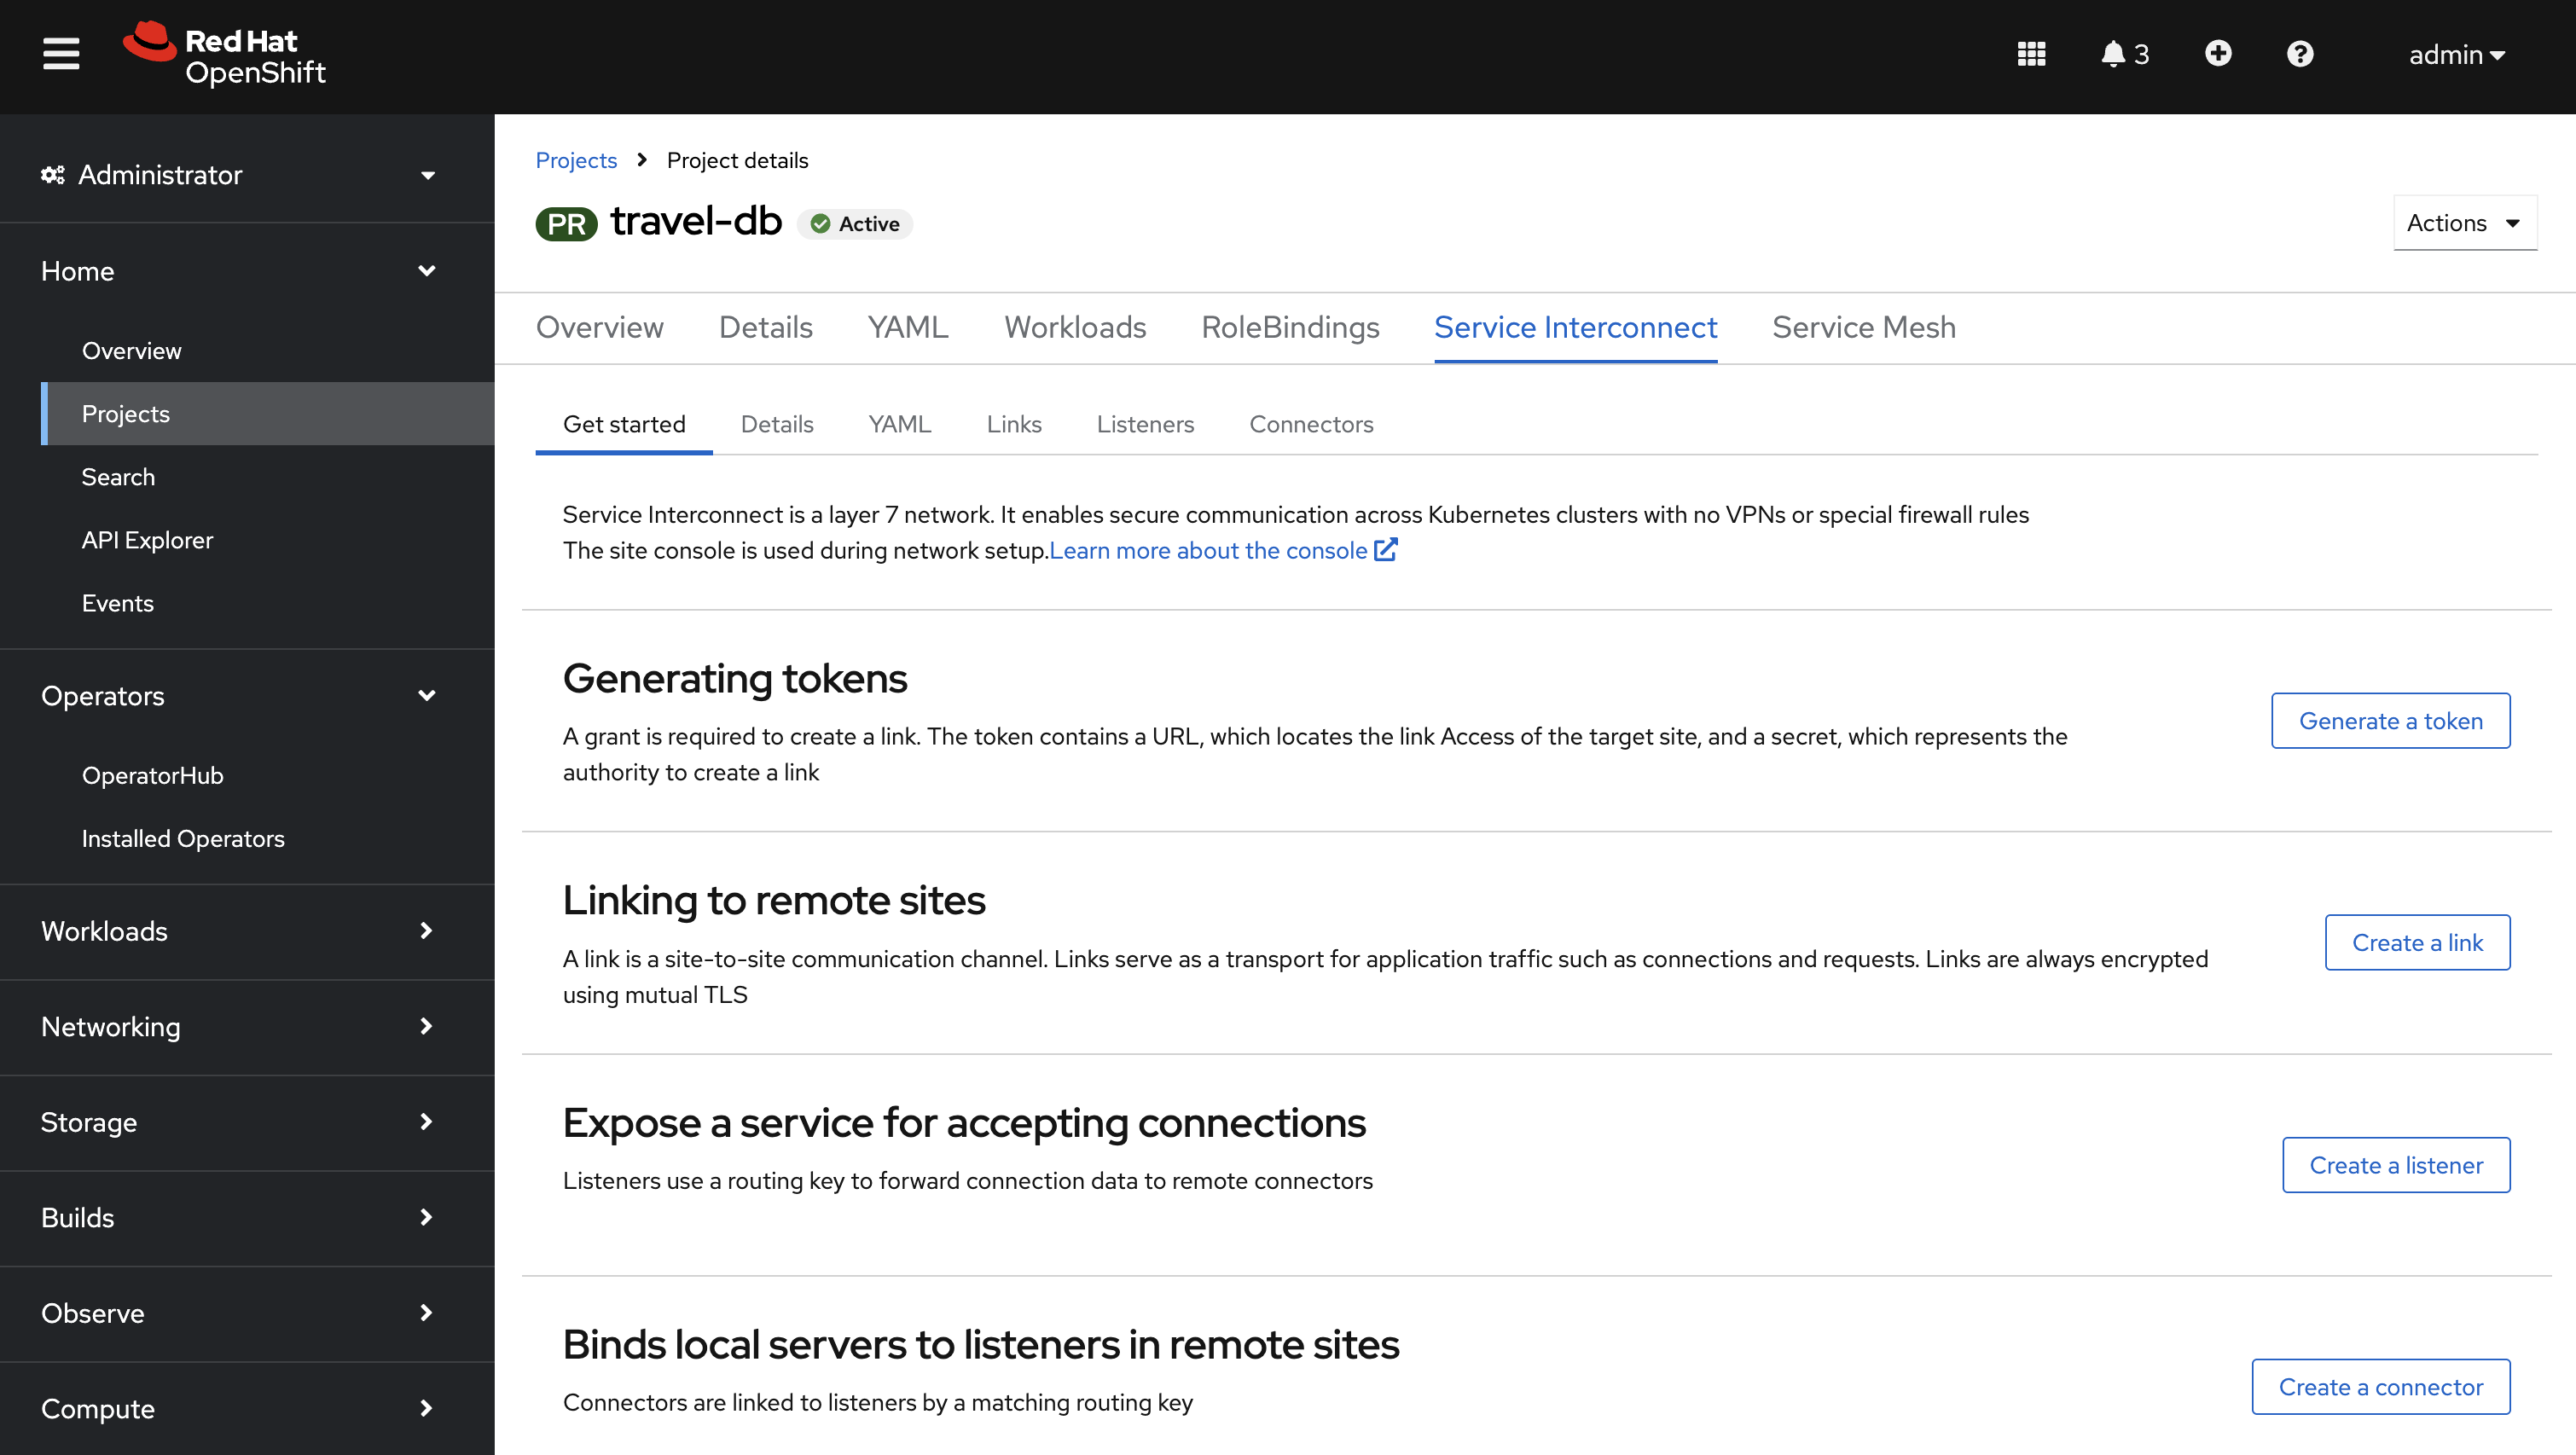
travel-dbproject, click on the Service Interconnect tab or click on this {ocp_cluster_openshift_cluster_console_url}/k8s/cluster/projects/travel-db/openshift-site-plugin[link, window="console"] to navigate directly. -
Click on Create site.
-
In the Create site wizard, keep the default values.
-
Note that the Enable link access is checked, indicating that this site will allow ingress connections from other sites.
-
Click on Submit to set up the VAN routers in the
travel-dbnamespace.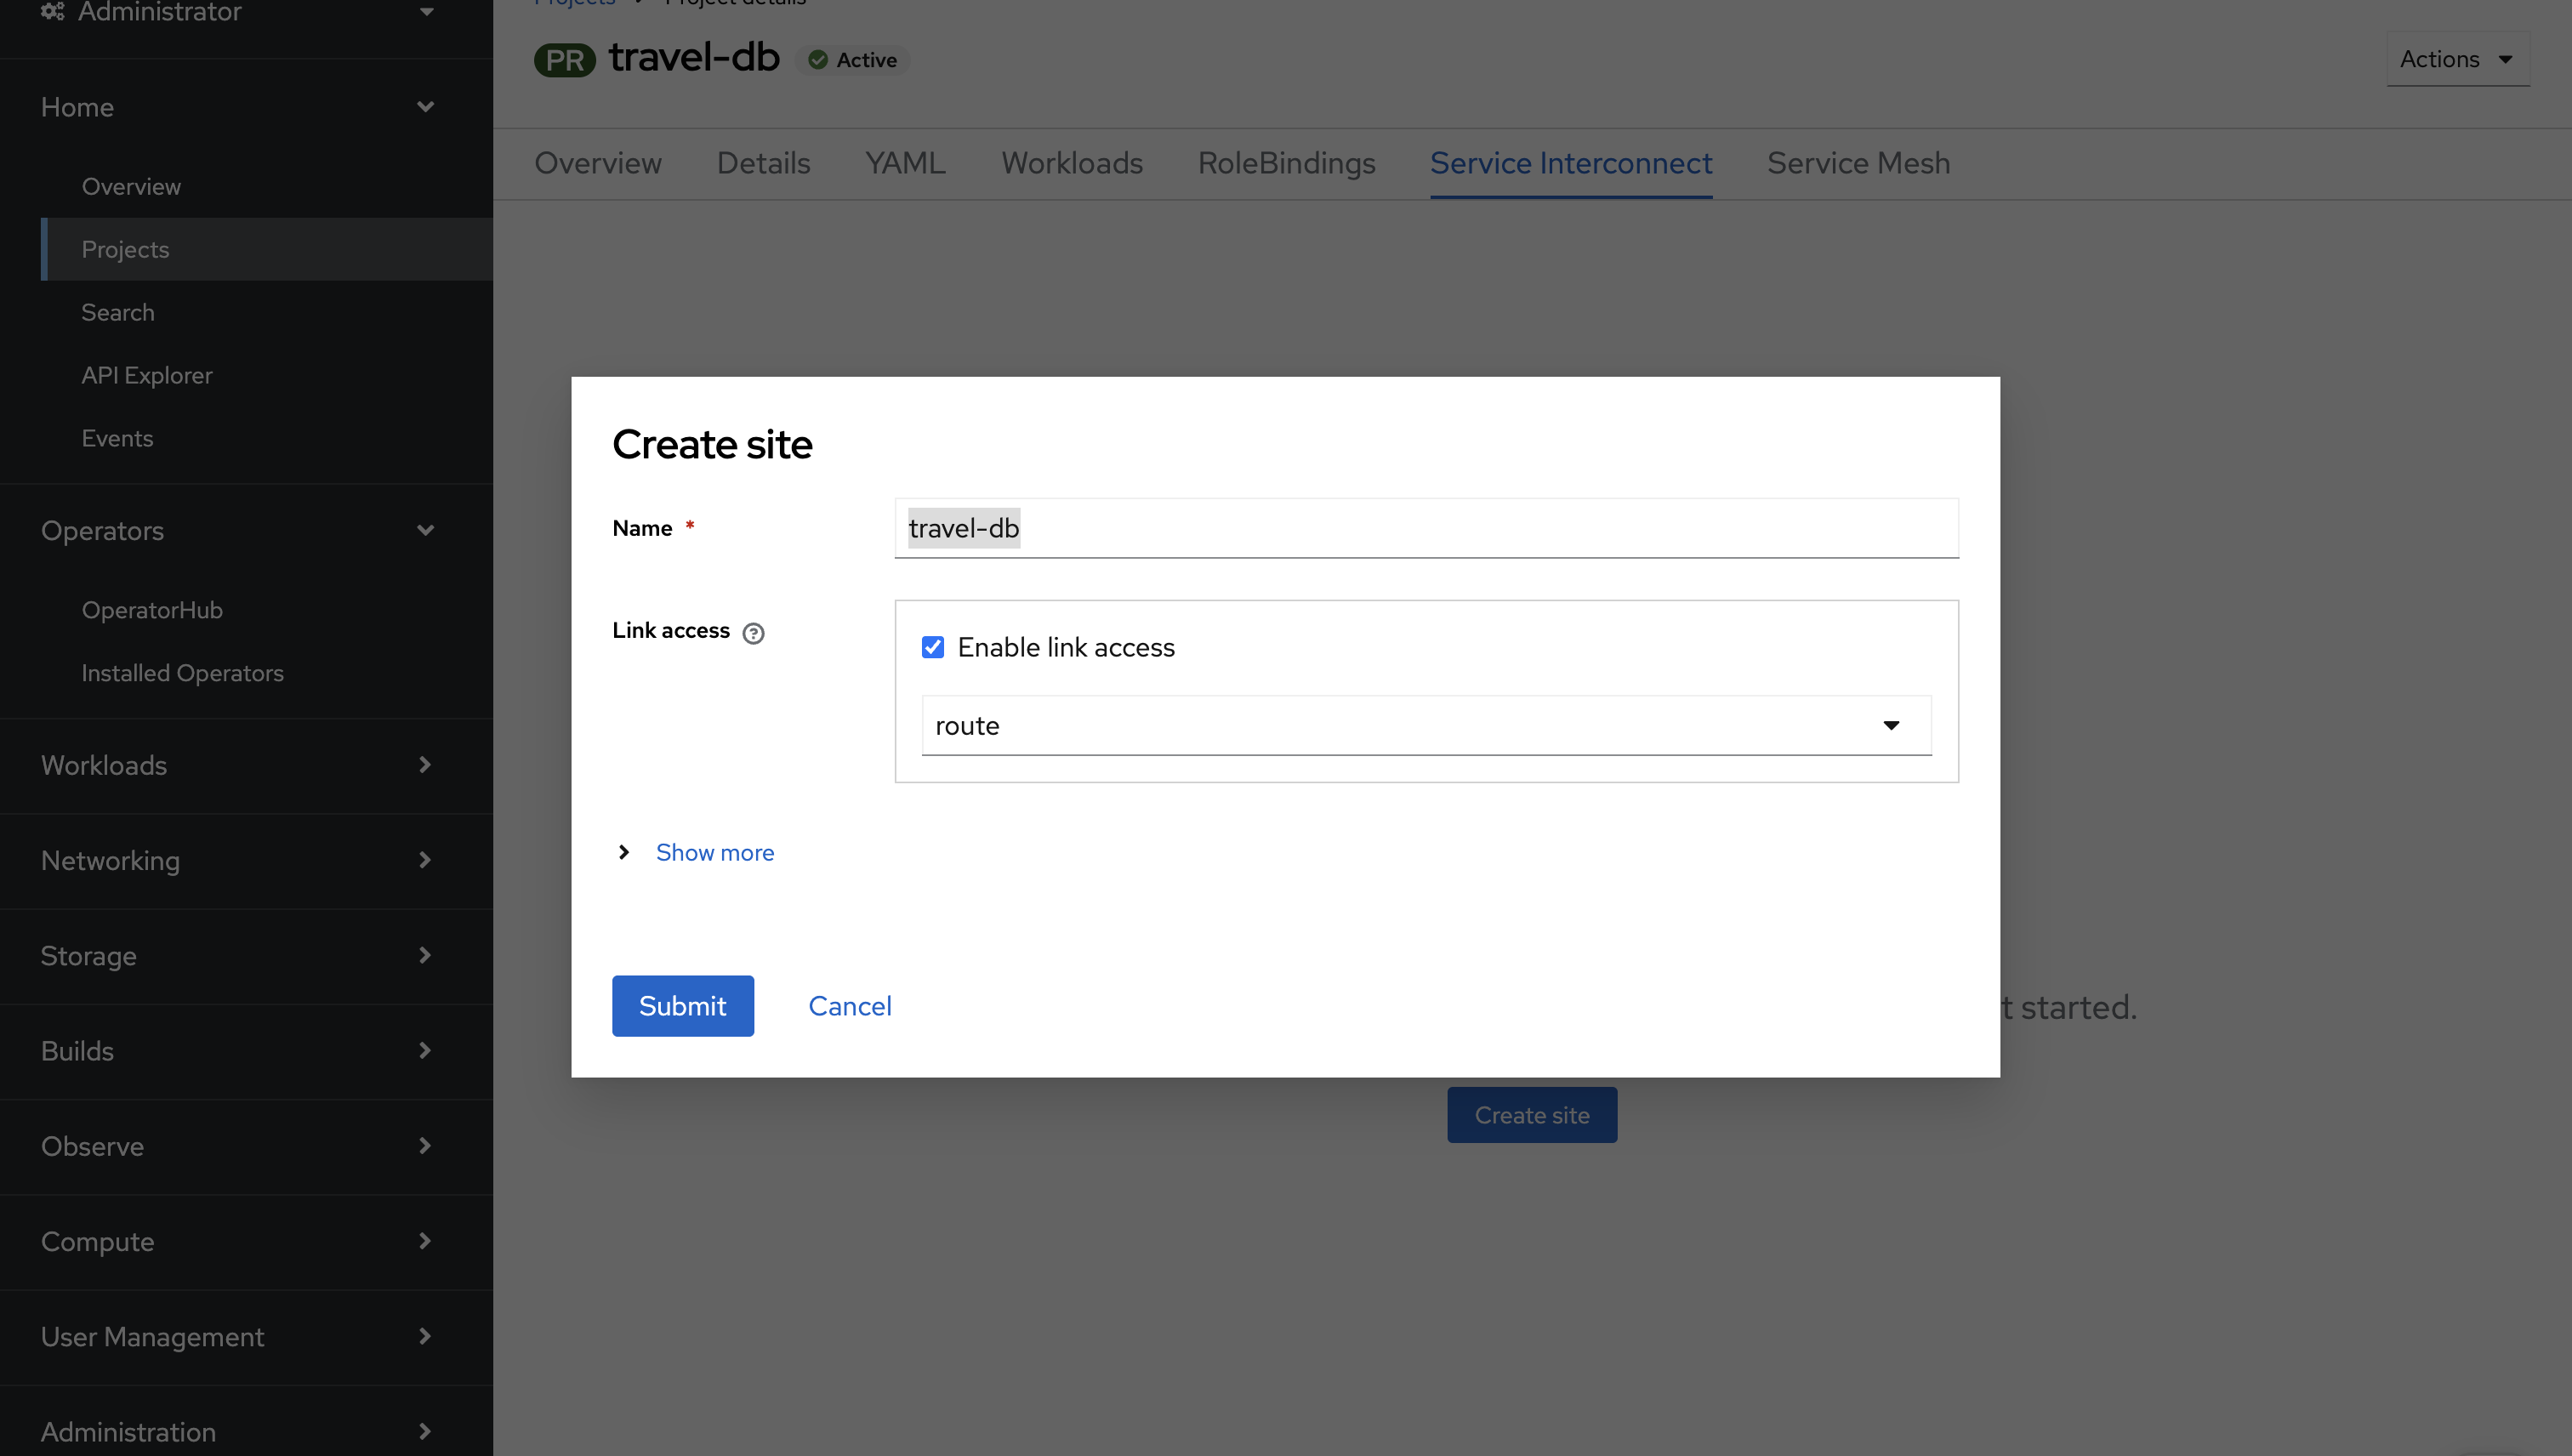
-
-
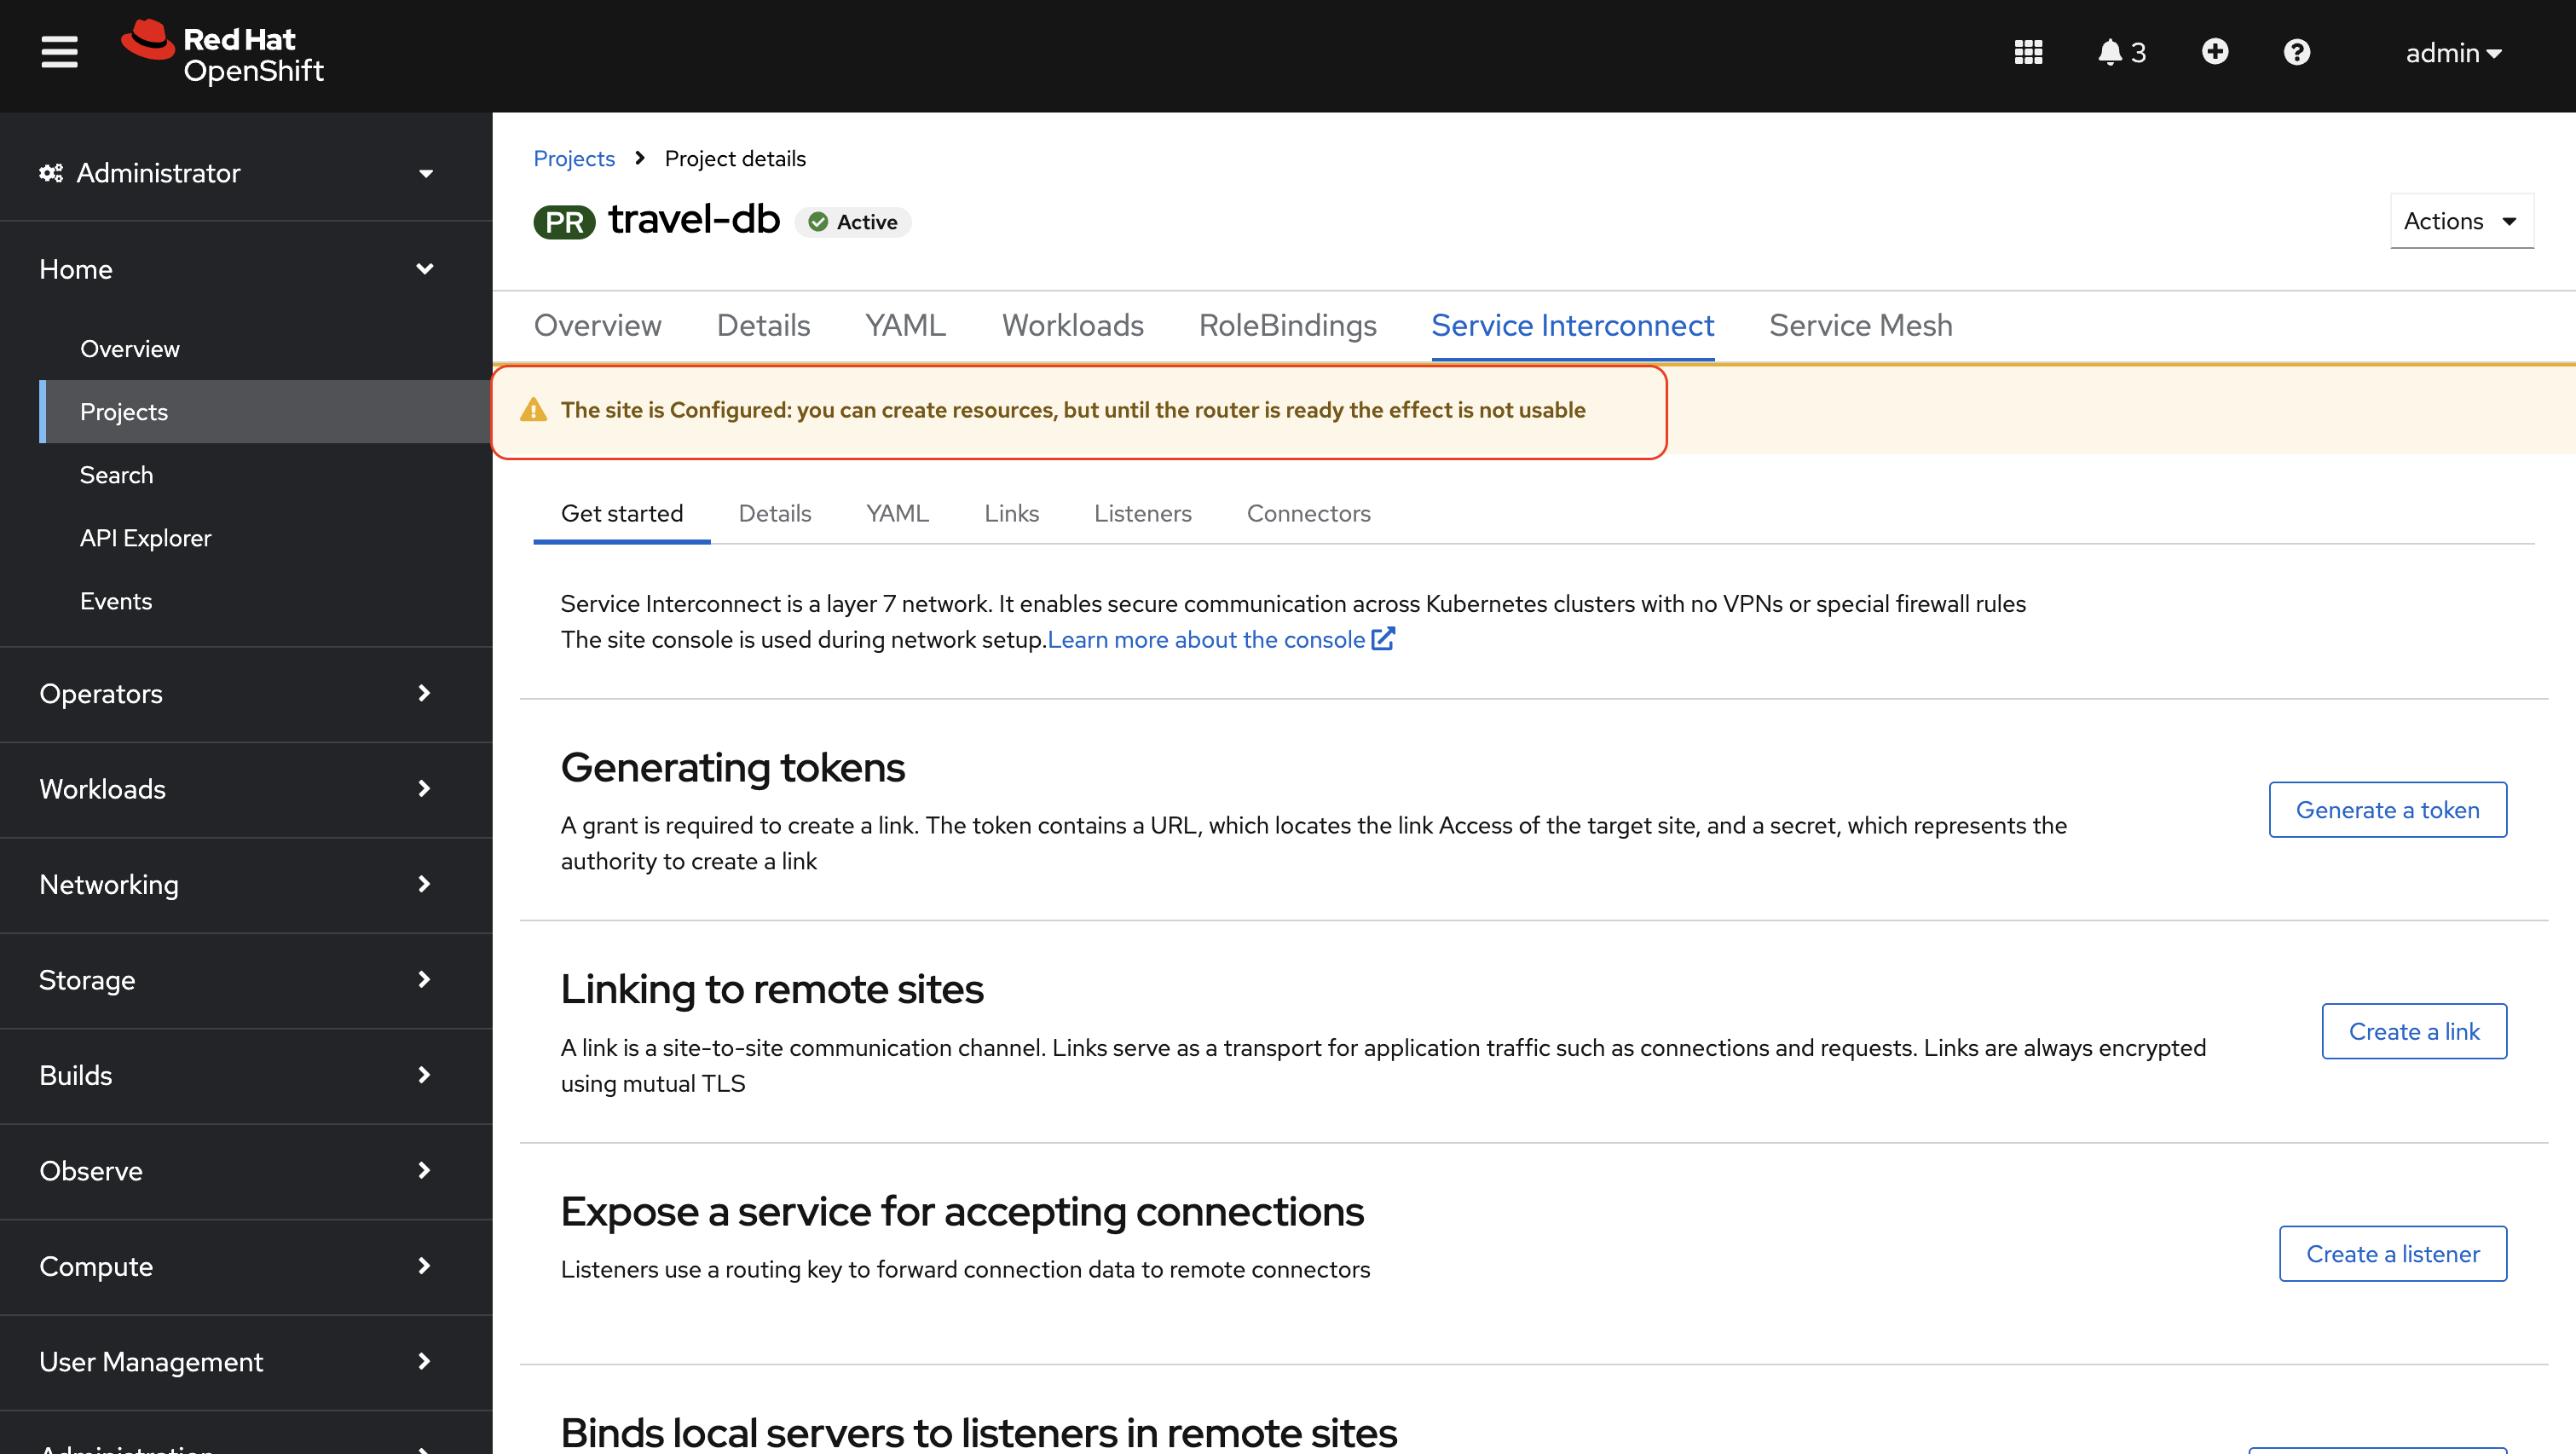
You will see a message indicating that the Service Interconnect site is being created. In a few seconds, the warning message will disappear, and the site will be created.
-
The warning message disappears once the site is created.
You will also notice a
Readystatus displayed in the Details tab, confirming that the site is ready.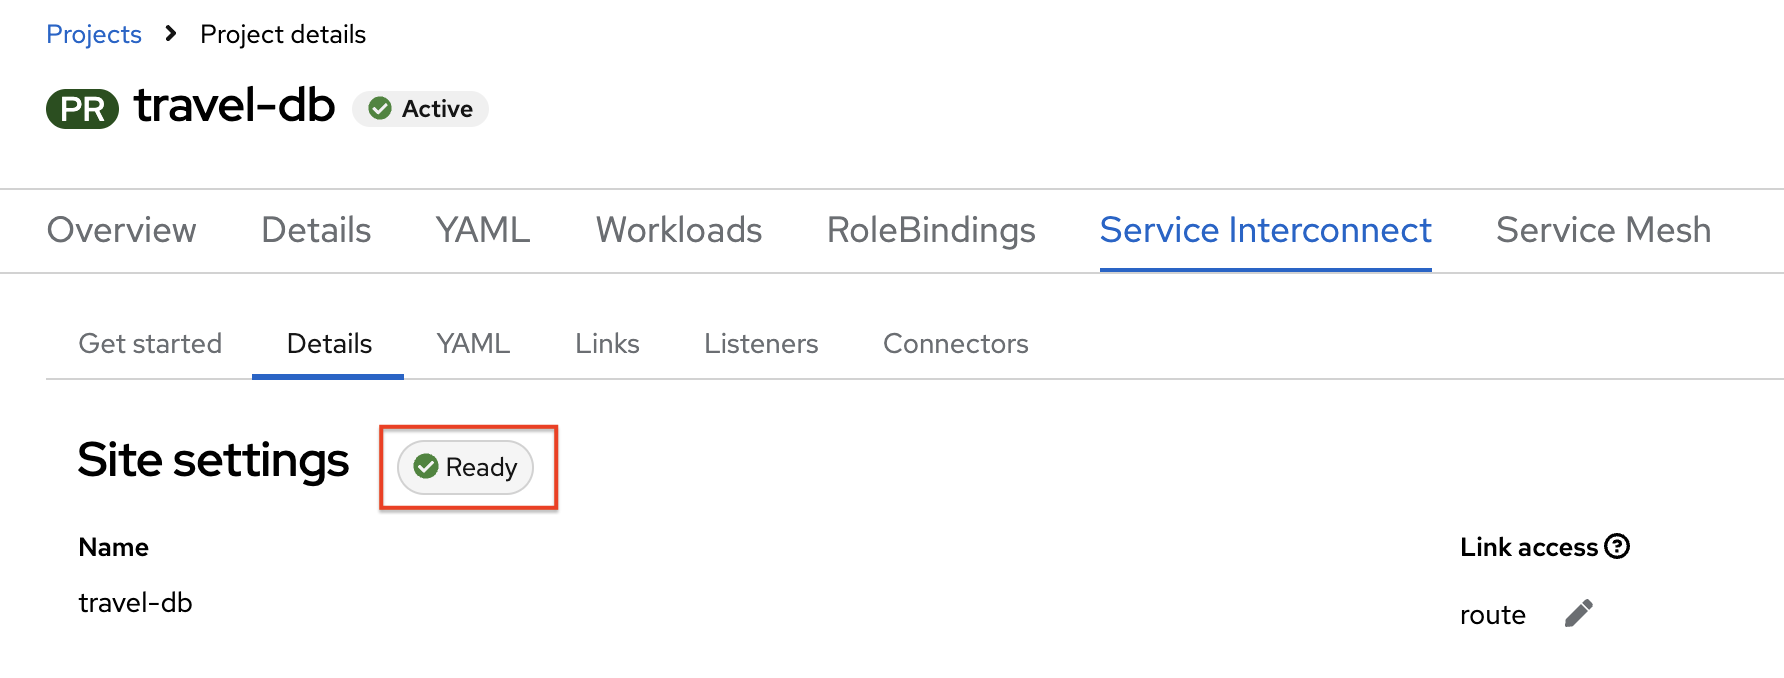
Set up a Red Hat Service Interconnect Listener
-
Click on {ocp_cluster_openshift_cluster_console_url}/k8s/cluster/projects/travel-db/openshift-site-plugin[Create listener, window="console"] to set up a listener in the
travel-dbnamespace.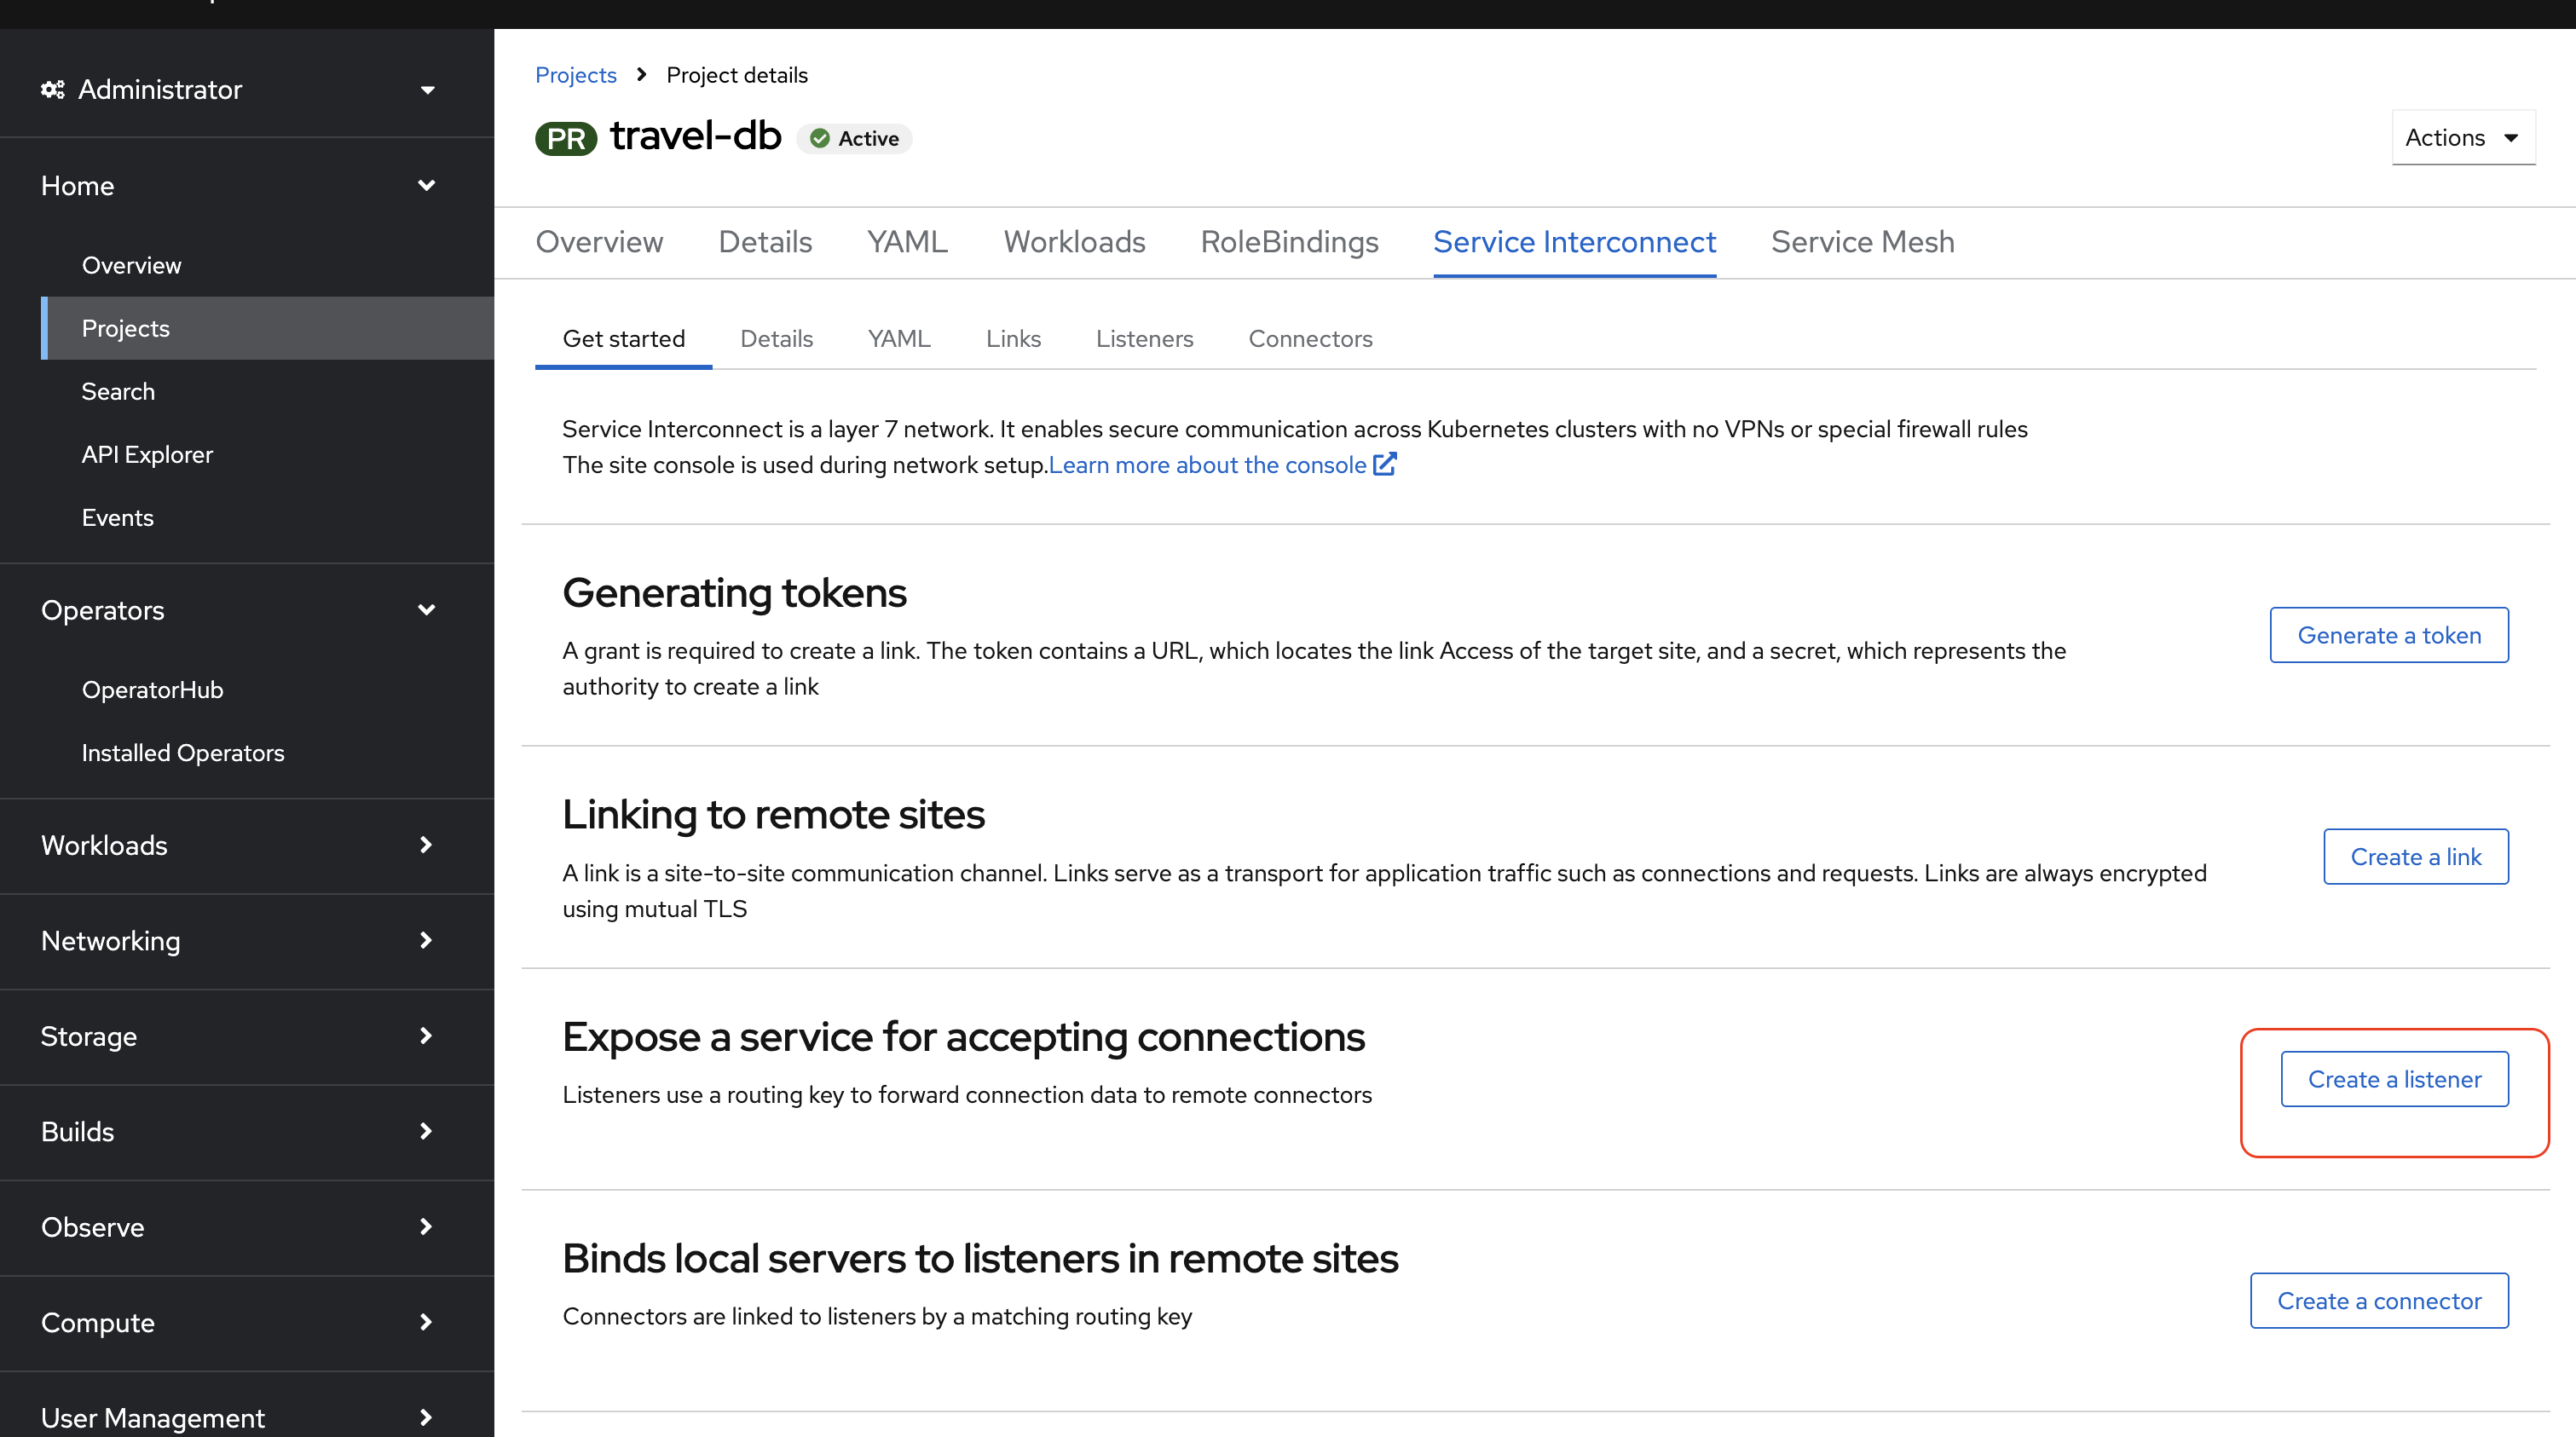
-
Input the following details and click Submit
-
Name:
mysqldb -
Port:
3306 -
Routing key:
appconn -
Host:
mysqldb -
TLS secret: leave this blank for now, as you will instead create a token at a later step.

-
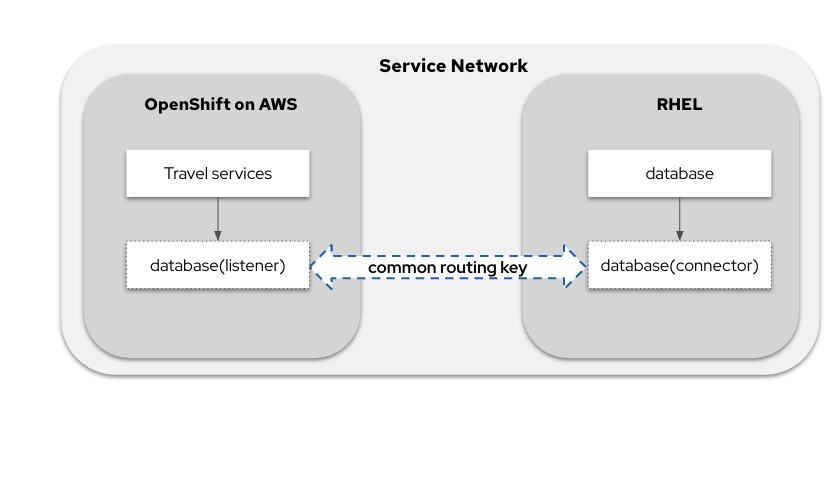
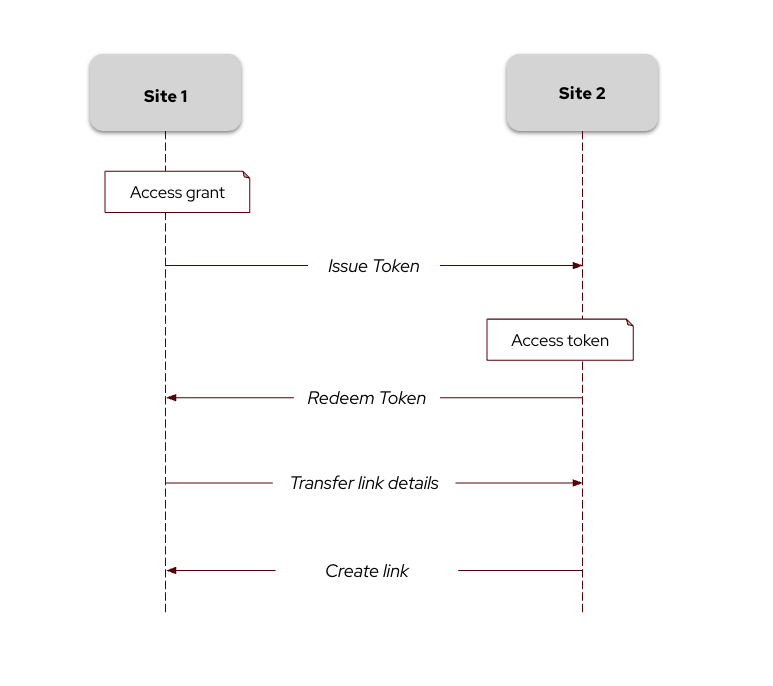
Set up an Access Token
This image explains this concept in more detail.
-
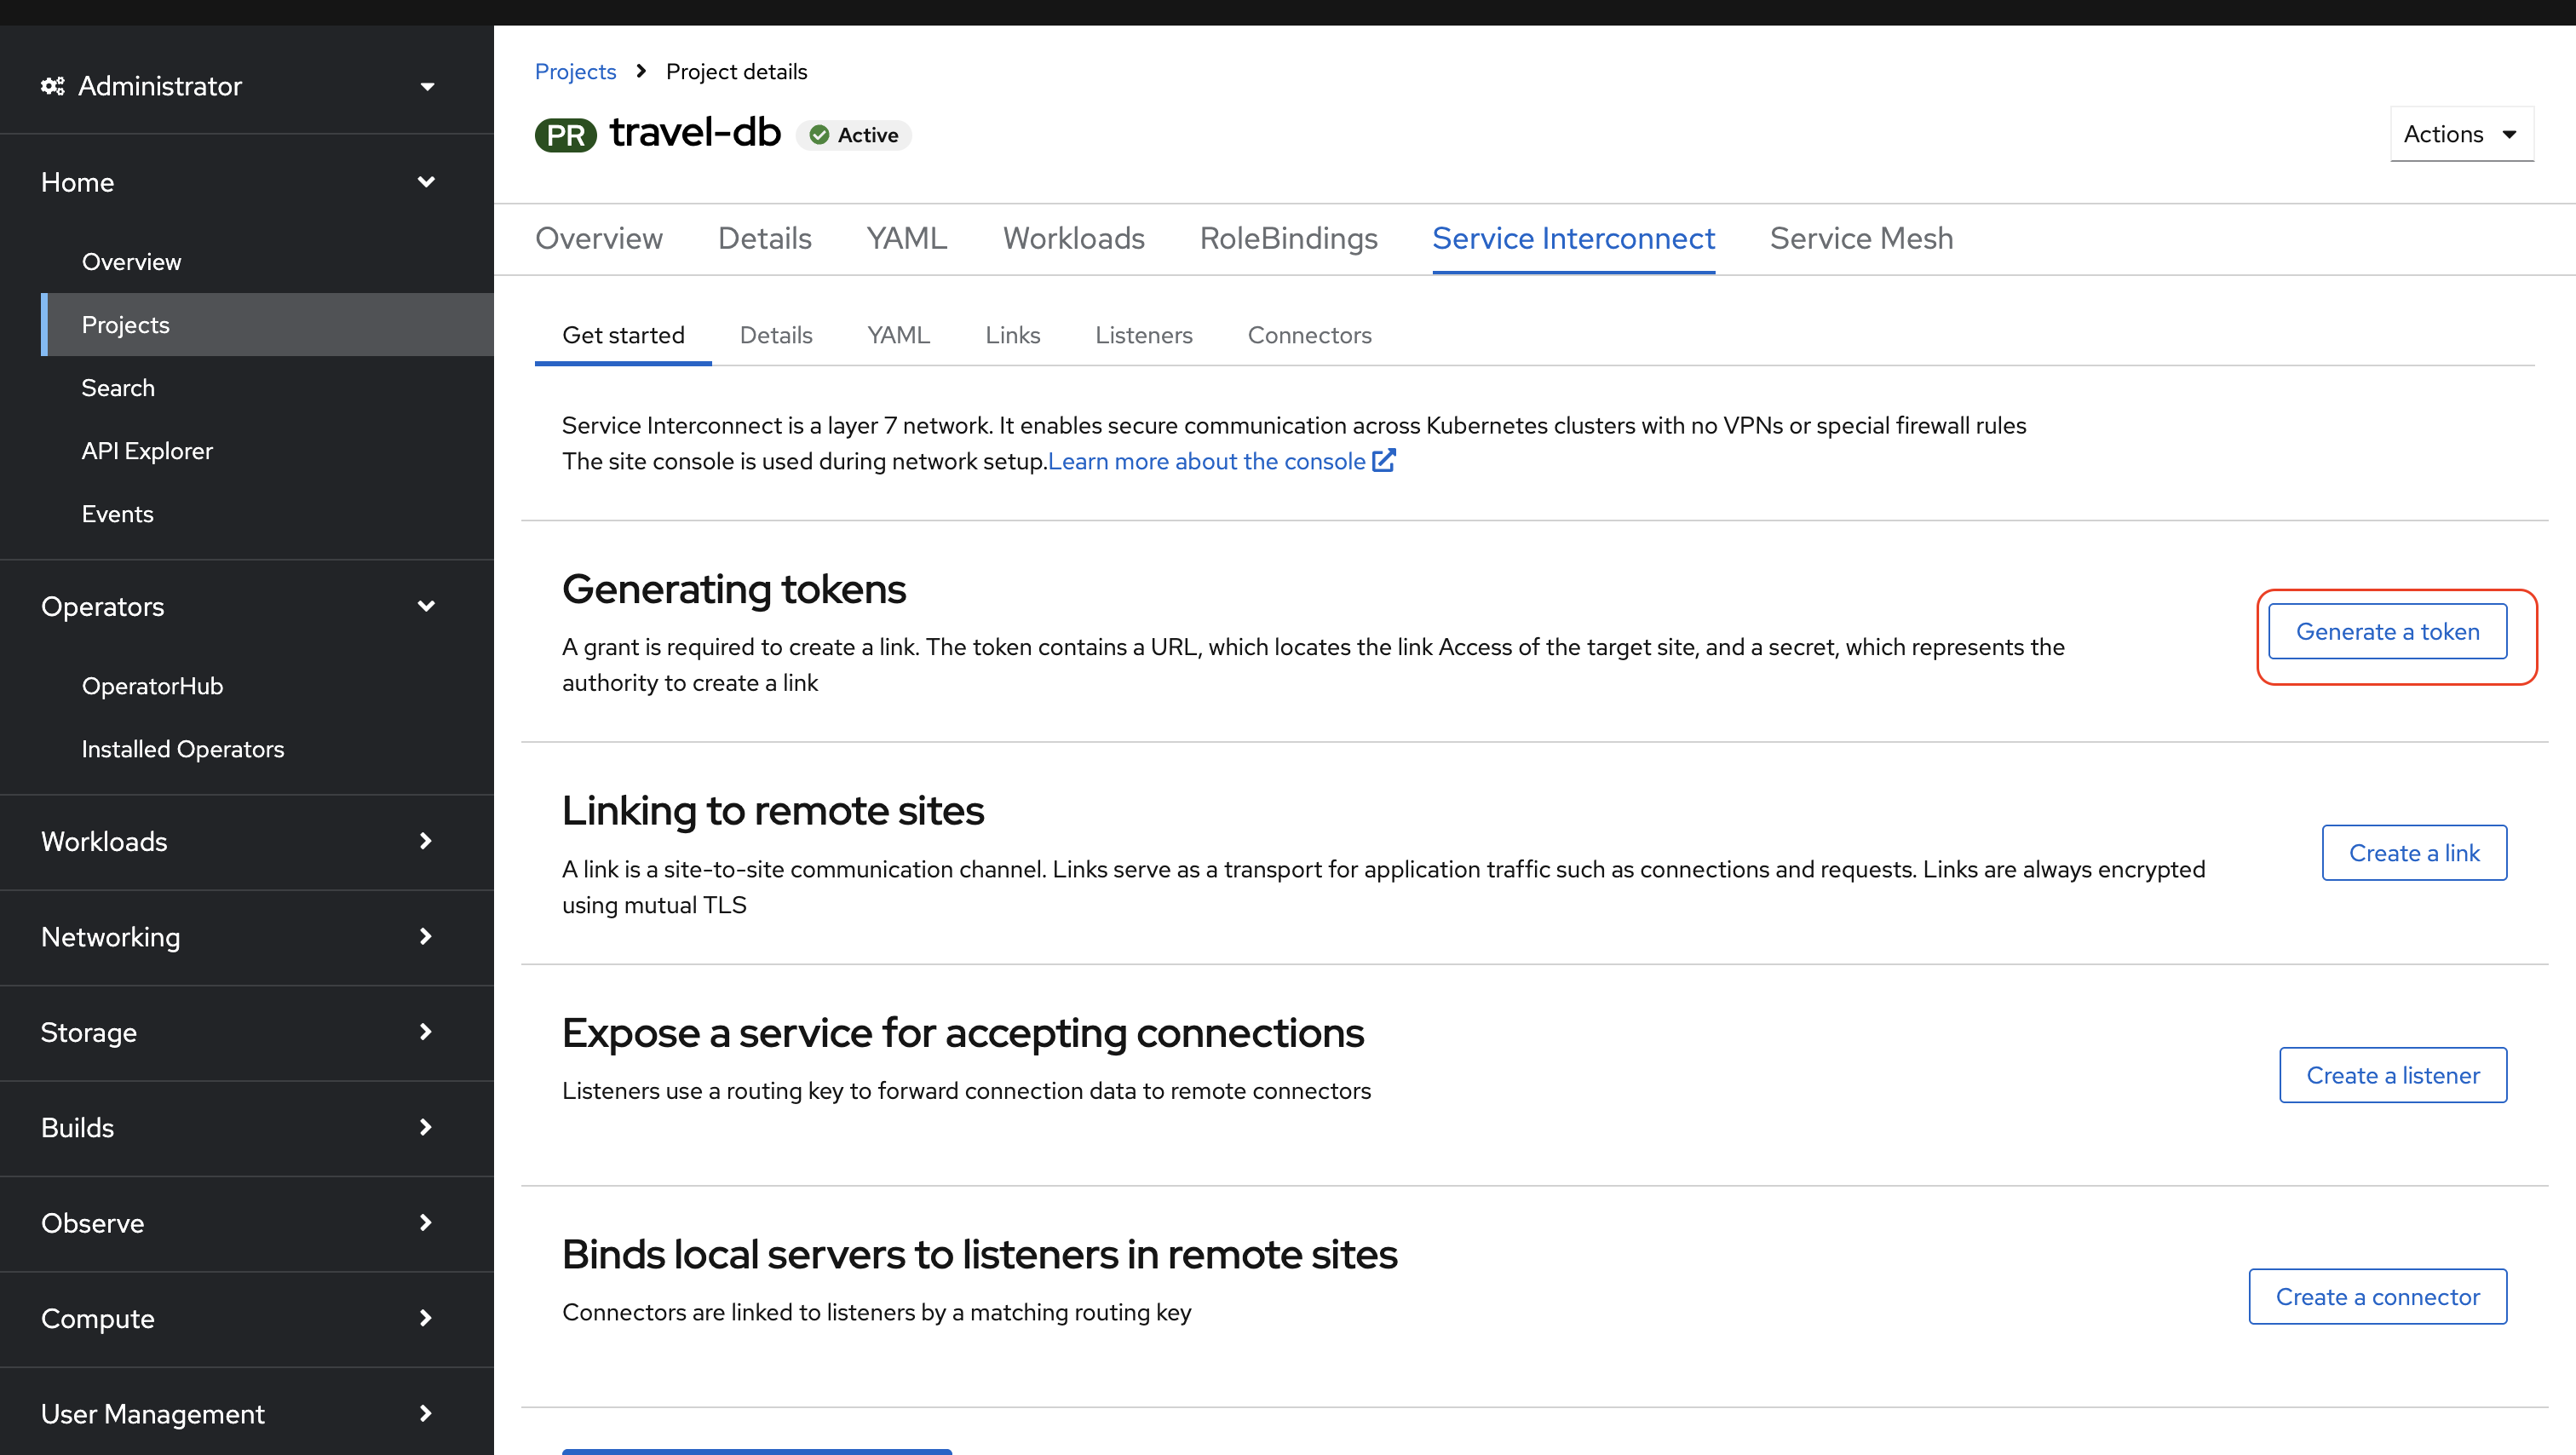
Click on {ocp_cluster_openshift_cluster_console_url}/k8s/cluster/projects/travel-db/openshift-site-plugin[Generate a token, window="console"].
-
You are presented with the Issue Access Token wizard. In the Configuration step, enter the following values, and click the Create button.
-
FileName:
my-grant -
Redemptions:
1 -
Code: leave this blank
-
Valid for:
60minutes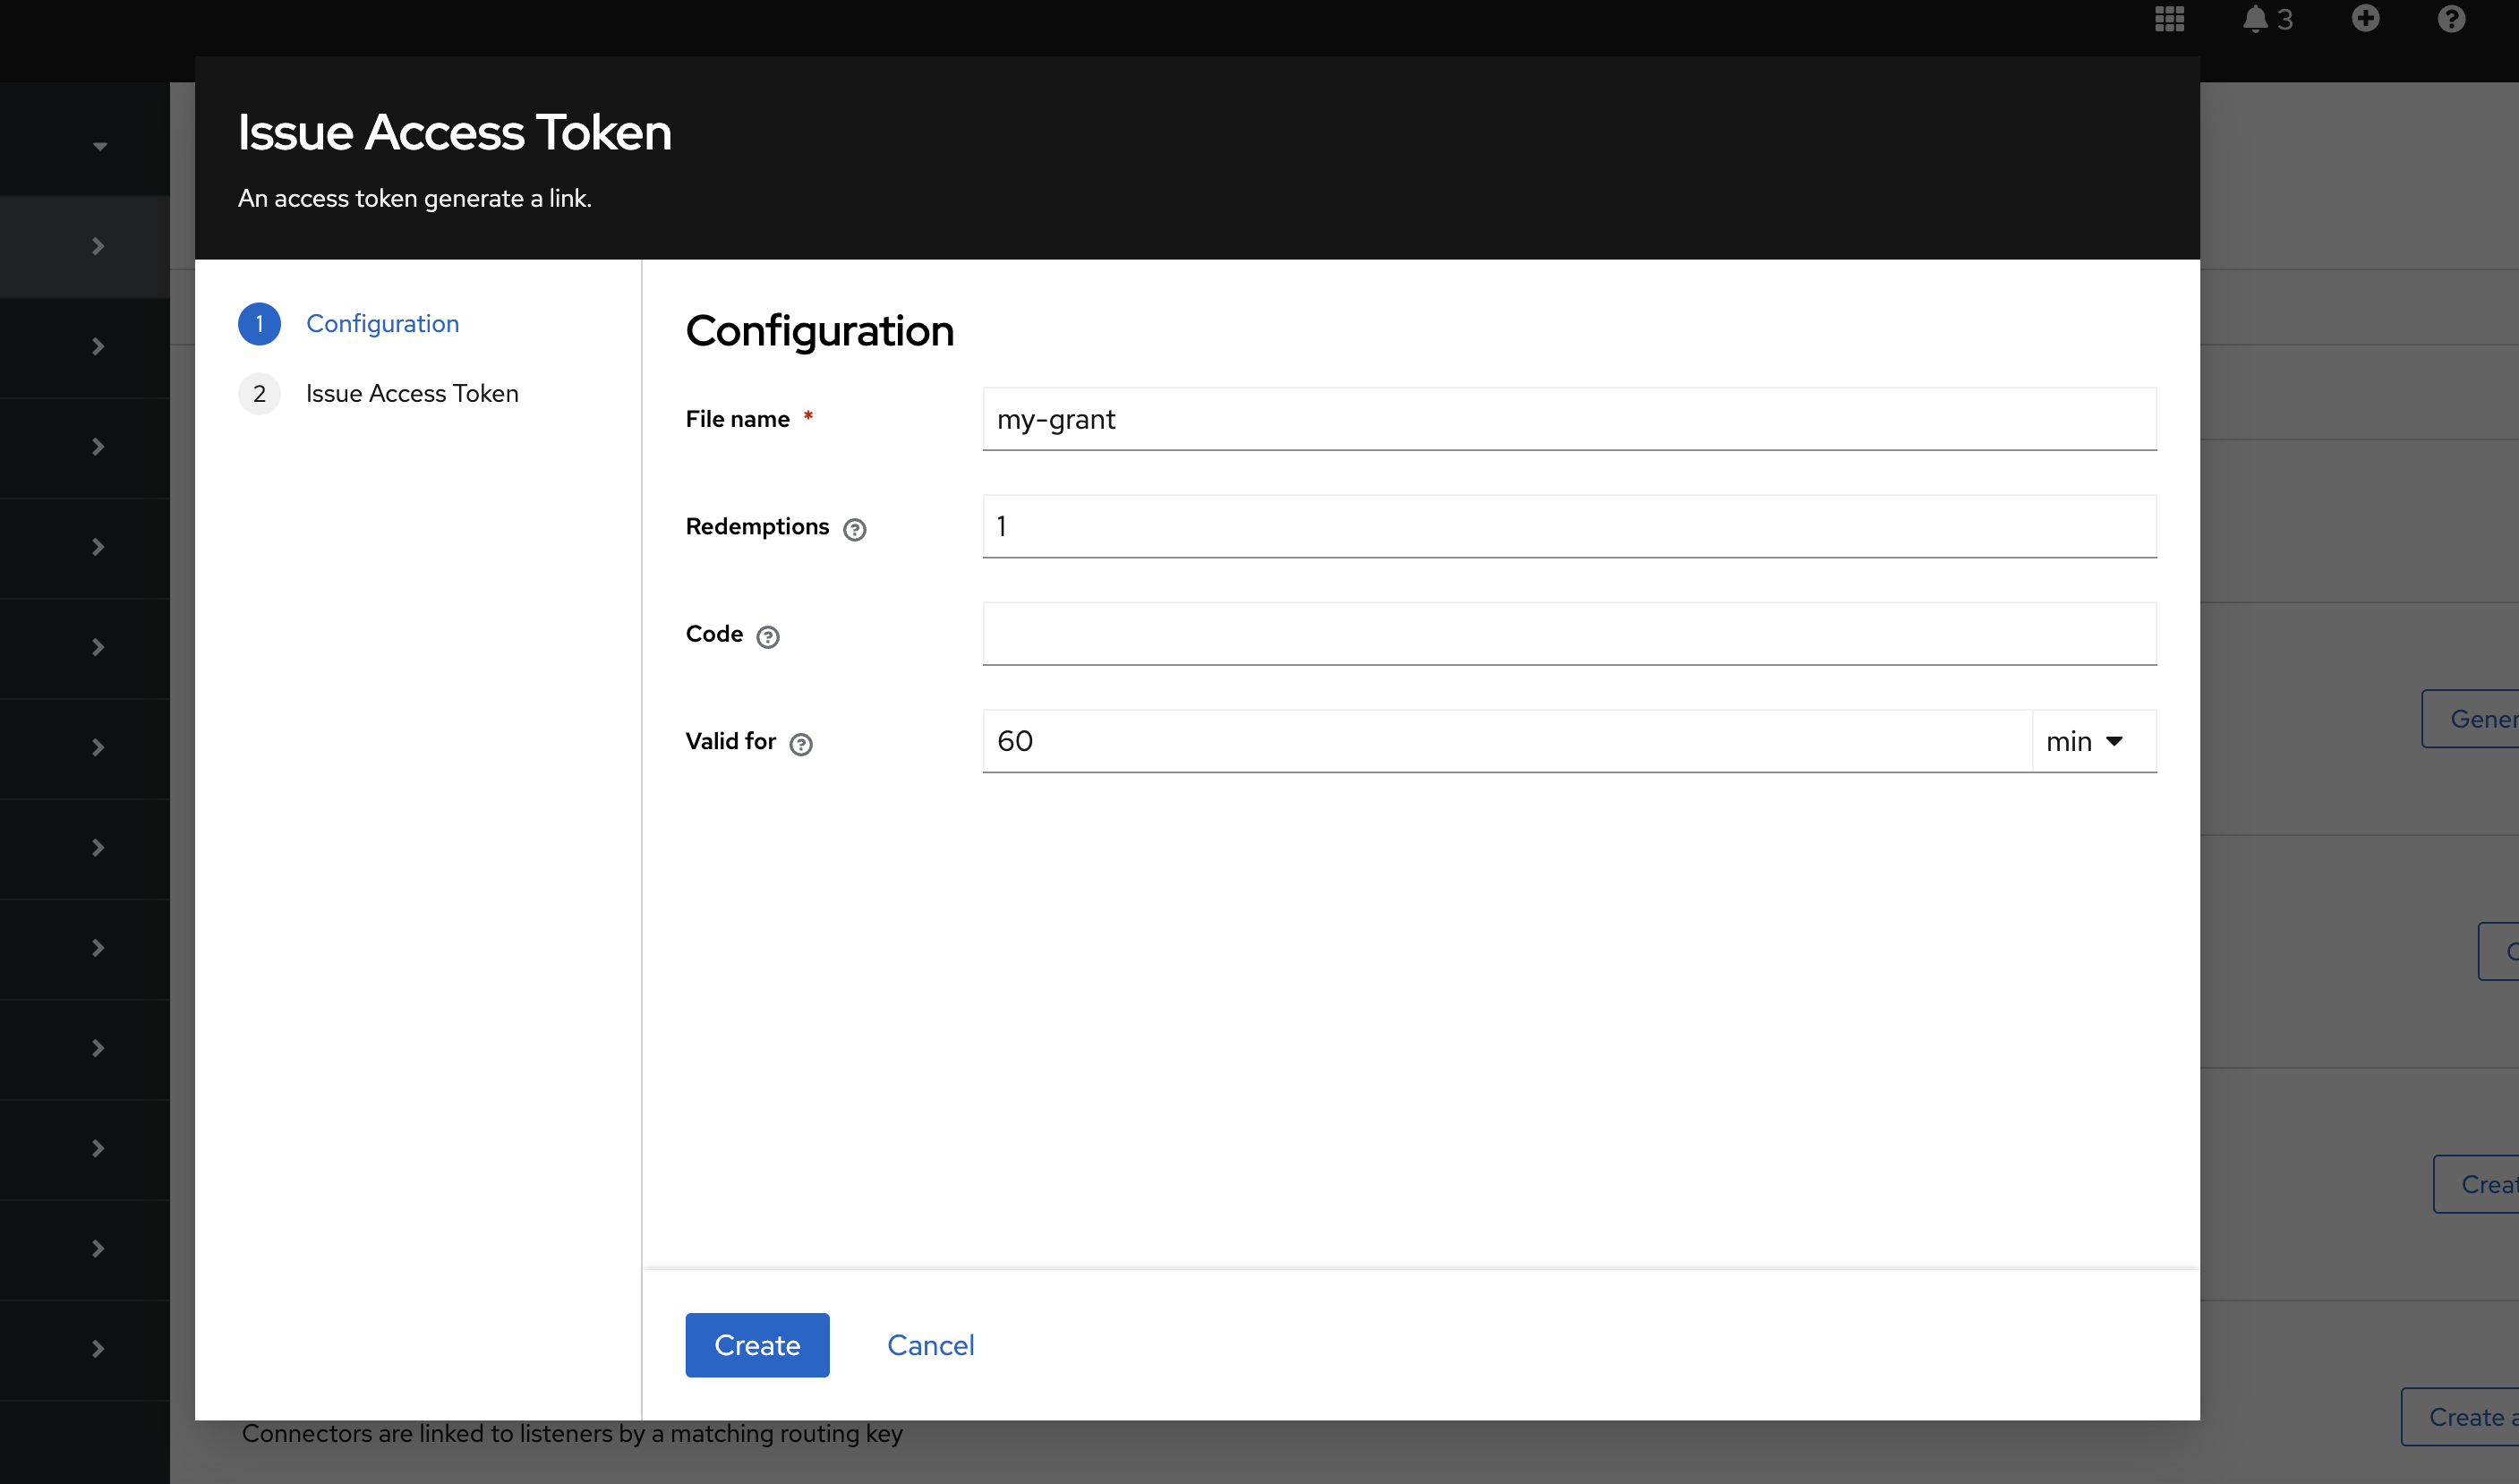
-
-
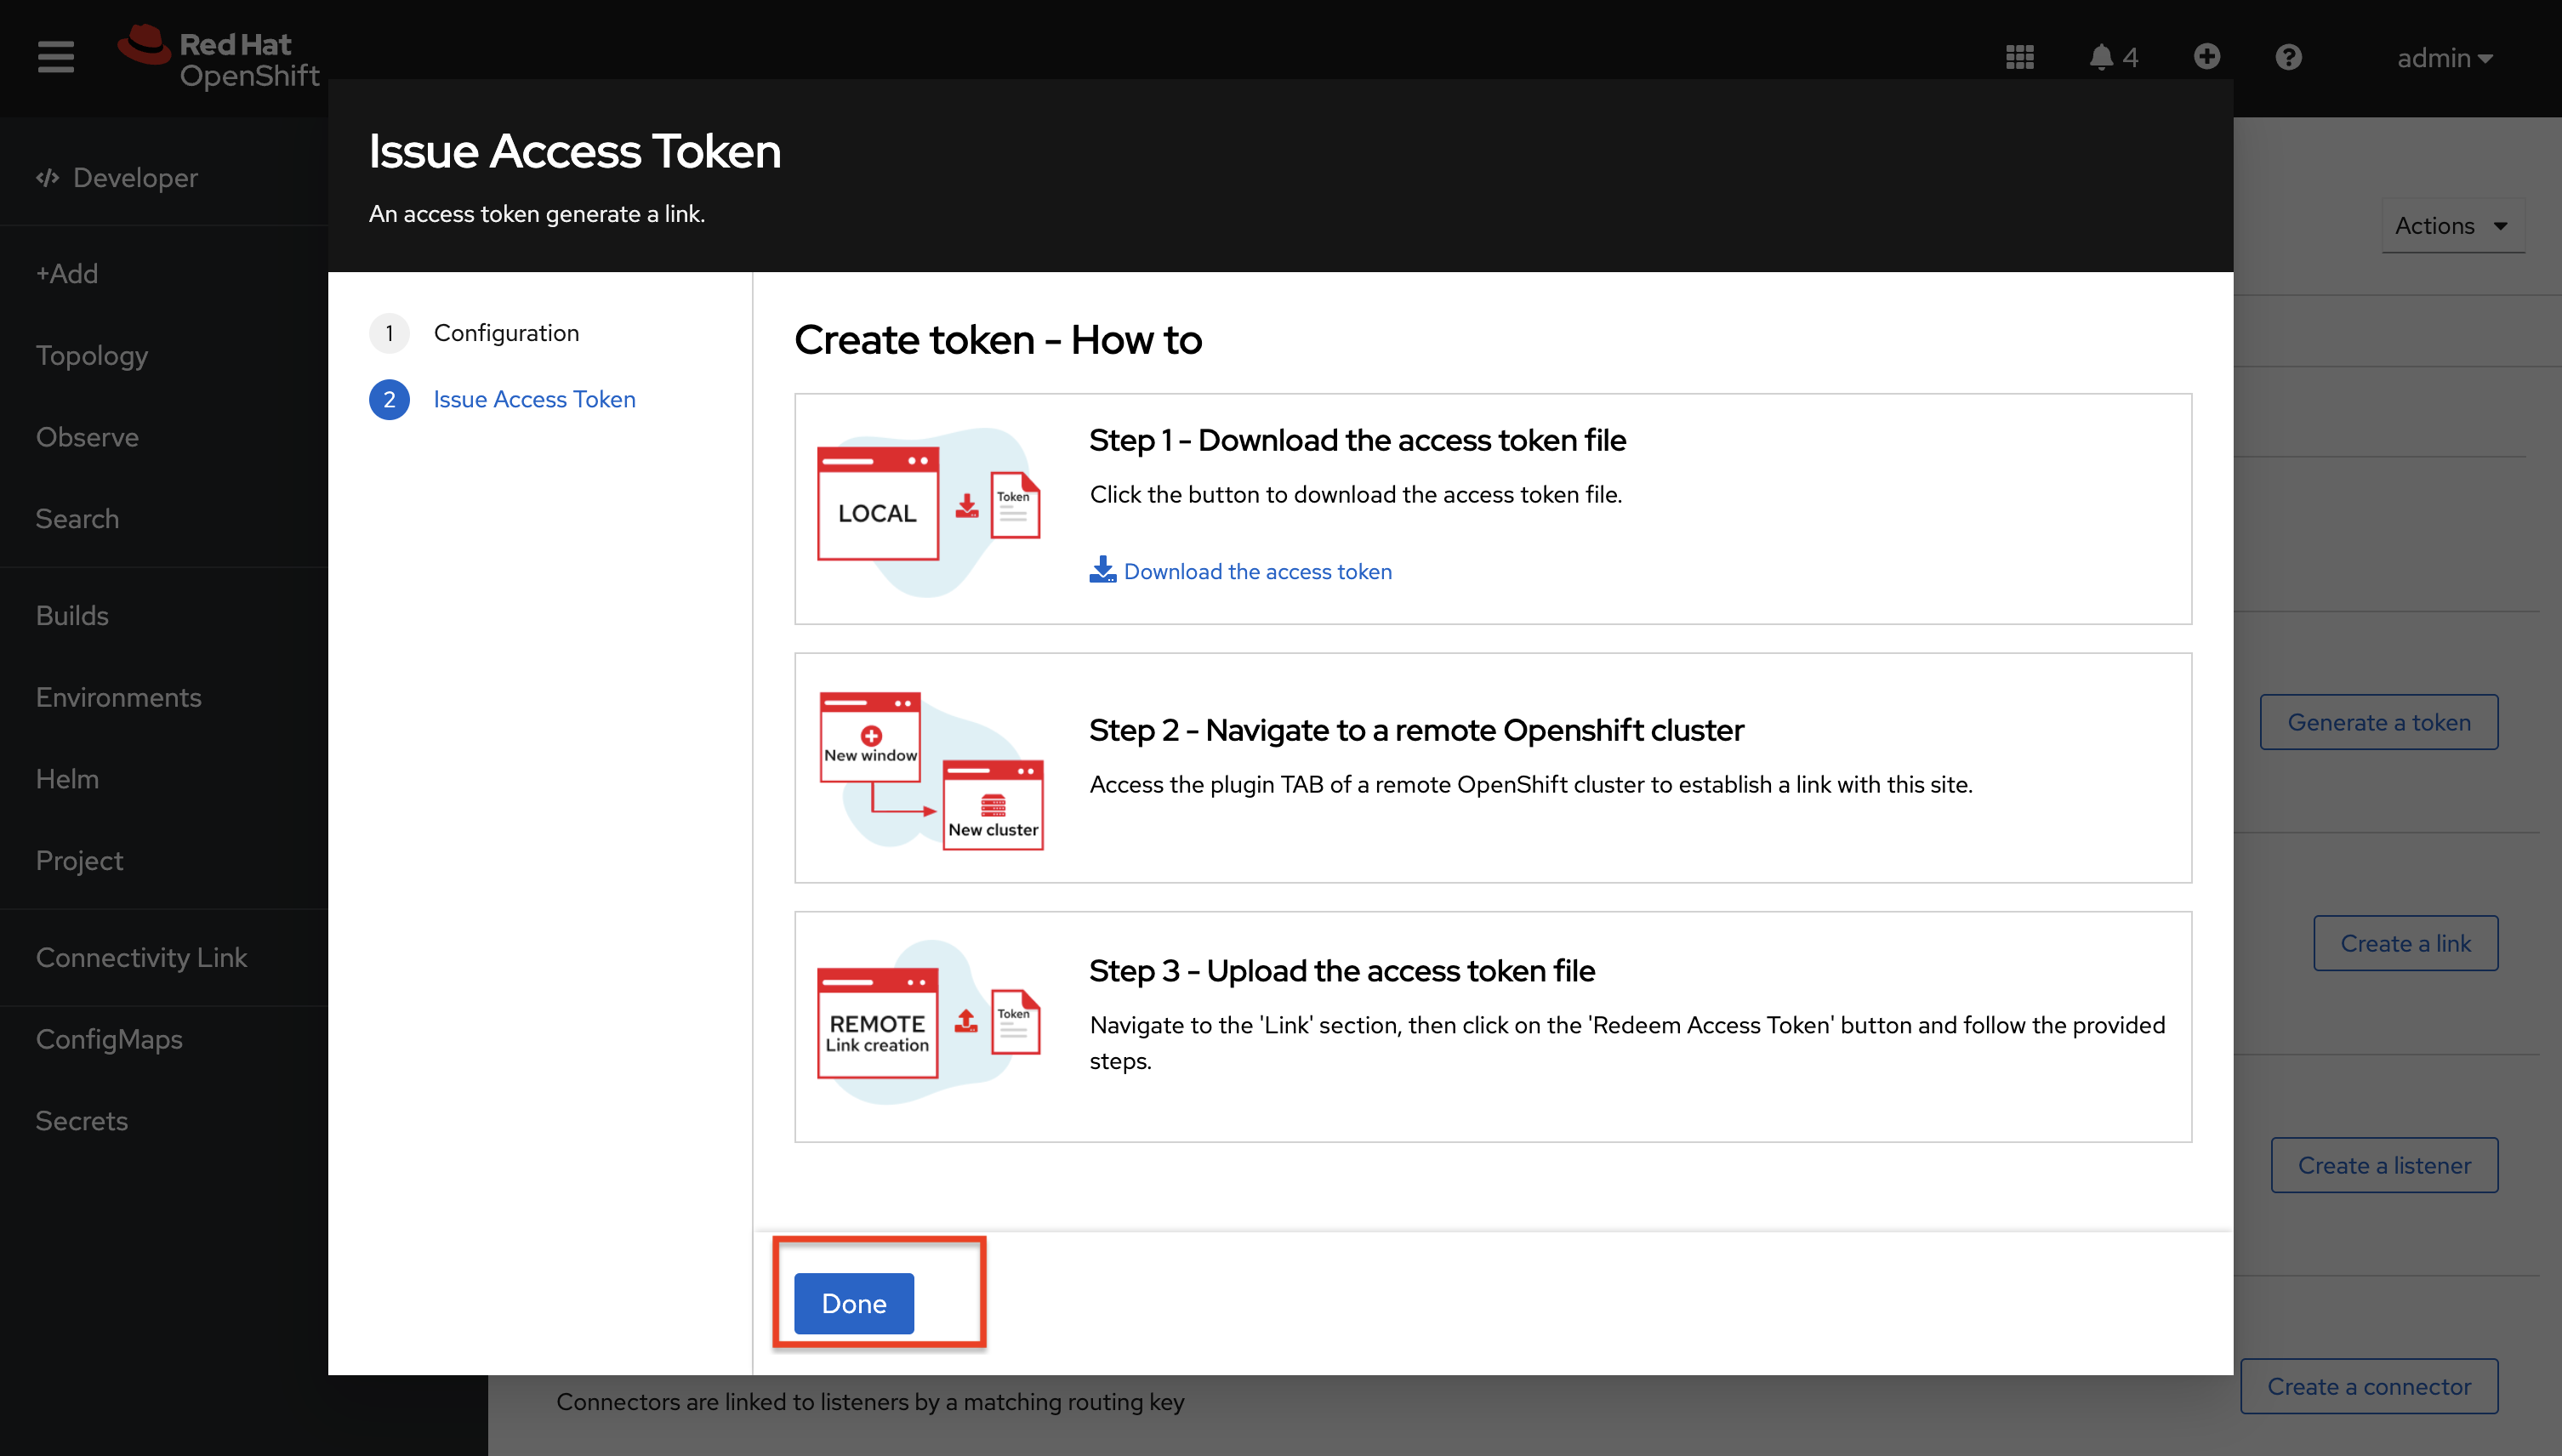
You will be presented with the Create token - How to step.
-
You can ignore the rest of the steps since you will use a script to directly convert the grant and transfer it to the on-premises RHEL server without the need for downloading the file.
-
If you would like to inspect how the token looks, you can still proceed to download and open the file.
-
Click on Done.
-
-
From the OpenShift Terminal (upper terminal), run the following command to deploy the Red Hat Service Interconnect Network Console.
oc apply -f https://raw.githubusercontent.com/app-connectivity-workshop/scripts/refs/heads/main/m1/network_console_deploy.yaml -n travel-dbYou will use this console to visualize the network later. Since it takes a few seconds to initialize, go ahead and deploy it now. While it is getting deployed, proceed to the next steps to save time.